10 Easy DIY Projects Using Recycled Materials
Are you looking for fun and eco-friendly ways to spruce up your home with DIY projects? Look no further! In this article, we'll delve into 10 easy projects that allow you to repurpose everyday items into unique and practical creations. These projects not only help reduce waste but also add a personal touch to your decor. Let's dive into the world of creative recycling!
1. Upcycled Glass Jar Lanterns
Upcycled Glass Jar Lanterns: Have you ever thought about turning those empty glass jars lying around into beautiful lanterns? With just a few simple steps, you can transform them into charming light sources that add a cozy and eco-friendly touch to your space. By placing candles or fairy lights inside, these upcycled glass jar lanterns can illuminate your surroundings in a unique and sustainable way.

2. Repurposed Denim Coasters
When it comes to adding a touch of creativity and sustainability to your home decor, repurposing old denim jeans into coasters can be a fun and practical DIY project. By giving new life to your worn-out denim, you not only protect your surfaces but also infuse a unique denim decor element into your living space.
To create these repurposed denim coasters, all you need are some old jeans, scissors, a needle, and thread. Start by cutting the denim into circular or square shapes, depending on your preference. You can also experiment with different sizes to accommodate various types of cups and glasses.
Once you have your denim pieces cut out, you can sew around the edges to prevent fraying and add a decorative touch. Feel free to get creative with your stitching patterns or use colorful threads to enhance the coaster's visual appeal.
These coasters not only serve a practical purpose by protecting your tables from moisture and heat but also add a touch of rustic charm to your home decor. They are easy to clean and maintain, making them a versatile and eco-friendly alternative to traditional coasters.
Imagine sipping your favorite beverage on a coaster made from your favorite pair of jeans, adding a personal and nostalgic element to your daily routine. These repurposed denim coasters are not just functional items but also conversation starters that showcase your creativity and commitment to sustainable living.

3. Recycled Magazine Wall Art
Are you looking to add a unique touch to your walls without breaking the bank? Why not try creating your own recycled magazine wall art! This DIY project allows you to unleash your creativity while also being environmentally conscious. By repurposing old magazines, you can transform them into colorful and eye-catching decorations for your home.
To start this project, gather a collection of old magazines with vibrant images and colors. You can choose magazines with themes that resonate with your style or opt for a mix of various publications to create a diverse look. The key is to have a wide selection of colors and patterns to work with.
Next, roll up the pages of the magazines tightly to create colorful tubes. You can experiment with different rolling techniques to achieve varying shapes and sizes. Once you have a sufficient number of rolled-up magazine pages, it's time to start arranging them on a canvas or a sturdy backing board.
Consider creating patterns or designs with the rolled-up magazine tubes to add visual interest to your wall art. You can play around with different layouts, mixing and matching colors to create a dynamic composition. This step allows you to personalize your recycled magazine wall art and make it truly one-of-a-kind.
Once you are satisfied with the arrangement, secure the rolled-up magazine tubes onto the canvas or backing board using strong glue. Make sure to press them firmly in place to ensure they adhere properly. You can also add a protective layer of varnish or sealant to enhance the durability of your creation.
Hang your finished recycled magazine wall art in a prominent place in your home to showcase your artistic flair and eco-friendly approach to decorating. Not only will this project add a pop of color to your walls, but it will also serve as a conversation starter, highlighting your commitment to sustainability and creativity.

4. Upcycled Tin Can Planters
Looking for a fun and sustainable way to add some greenery to your space? Why not try creating your own upcycled tin can planters? This simple yet creative DIY project allows you to repurpose empty tin cans into stylish planters that not only look great but also help promote a more eco-friendly lifestyle.
To start, gather some empty tin cans from your recycling bin. Make sure to clean them thoroughly to remove any labels or residue. Once cleaned, you can begin the transformation process by painting the cans in vibrant colors or patterns to suit your style and decor.
After the paint has dried, fill the cans with nutrient-rich soil and choose your favorite plants or herbs to pot. Whether you prefer colorful flowers, aromatic herbs, or lush succulents, these upcycled tin can planters provide a perfect home for your green friends.
For added flair, consider grouping several tin can planters together to create a charming indoor or outdoor garden display. You can even label each planter with the name of the plant inside using creative tags or markers for a personalized touch.
These upcycled tin can planters not only add a touch of greenery to your living space but also serve as a reminder of the beauty that can be created from everyday items that would otherwise end up in the trash. Get creative and let your imagination bloom with this simple and sustainable DIY project!

5. Repurposed Wine Cork Trivet
Do you have a collection of used wine corks lying around and wondering what to do with them? Why not repurpose them into a practical and stylish wine cork trivet! This DIY project not only helps you reduce waste but also adds a unique touch to your kitchen or dining area.
To create a wine cork trivet, start by collecting a sufficient number of wine corks. You can either use corks from your own wine bottles or ask friends and family to save them for you. Once you have gathered an array of corks, you can begin the fun and creative process of assembling them into a functional trivet.
One popular method is to arrange the wine corks in a pattern that fits together snugly. You can alternate the direction of the corks or create a geometric design, depending on your preference. Glue each cork securely to the next, ensuring that the trivet will hold up well under the heat of pots and pans.
Not only does a wine cork trivet protect your tabletops and counters from hot dishes, but it also serves as a conversation piece when entertaining guests. The natural texture and color variations of the wine corks add a rustic charm to your kitchen decor, making it both functional and visually appealing.
Furthermore, by repurposing wine corks into a trivet, you contribute to sustainability by giving these used items a new purpose instead of letting them end up in the trash. It's a small yet impactful way to practice eco-friendly habits in your daily life.
So, grab those wine corks, unleash your creativity, and craft a unique wine cork trivet that not only serves a practical function but also showcases your commitment to sustainability and innovation in your home.

6. Recycled CD Mosaic Mirror
Are you looking to add a touch of sparkle and creativity to your living space? Why not try making a Recycled CD Mosaic Mirror as a fun and eco-friendly DIY project? This project allows you to transform old CDs into a stunning piece of decor that reflects light and adds a unique flair to any room.
To create your Recycled CD Mosaic Mirror, start by collecting old CDs that you no longer use. You can also ask friends and family for their old CDs to gather a variety of colors and designs. Once you have a good selection of CDs, carefully cut them into small pieces using scissors or a craft knife.
Next, prepare a mirror frame or a plain mirror that you want to embellish with the mosaic design. Use a strong adhesive, such as epoxy glue, to attach the CD pieces to the frame or mirror surface. Arrange the CD fragments in a pattern or design of your choice, creating a mosaic effect that suits your style and preferences.
As you glue the CD pieces in place, consider mixing different colors and textures to add depth and visual interest to your mosaic mirror. You can create geometric patterns, floral motifs, or abstract designs, depending on your artistic vision and the overall aesthetic of the room where the mirror will be displayed.
Once you have completed the mosaic design and allowed the adhesive to dry thoroughly, polish the surface of the mirror with a soft cloth to remove any excess glue residue and ensure a clear reflection. Hang your Recycled CD Mosaic Mirror in a well-lit area where it can catch the light and dazzle with its upcycled charm.

7. Upcycled Pallet Wood Shelf
Looking to add a touch of rustic charm to your home? Why not try creating an upcycled pallet wood shelf? This project is not only a great way to repurpose old wooden pallets but also provides a trendy and sustainable storage solution. By sanding down the pallet wood and staining it in a color of your choice, you can transform these humble materials into stylish shelves that are perfect for displaying your favorite decor items or storing everyday essentials.
One of the best things about upcycling pallet wood is the versatility it offers. You can customize the size and shape of the shelves to fit your space perfectly, whether you're looking to create a small display shelf for a cozy nook or a larger storage unit for a living room or kitchen. The natural texture and grain of the wood add a unique touch to any room, giving it a warm and inviting feel.
Not only is this project a fun and creative way to decorate your home, but it also helps reduce waste by giving new life to materials that might otherwise end up in a landfill. By repurposing pallet wood, you're contributing to a more sustainable lifestyle and showing that eco-friendly decor can be both chic and environmentally conscious.
Imagine the satisfaction of seeing your upcycled pallet wood shelf proudly displayed in your home, knowing that you not only created a beautiful piece of furniture but also made a positive impact on the environment. So roll up your sleeves, grab your tools, and get ready to embark on a DIY adventure that combines creativity, sustainability, and style!
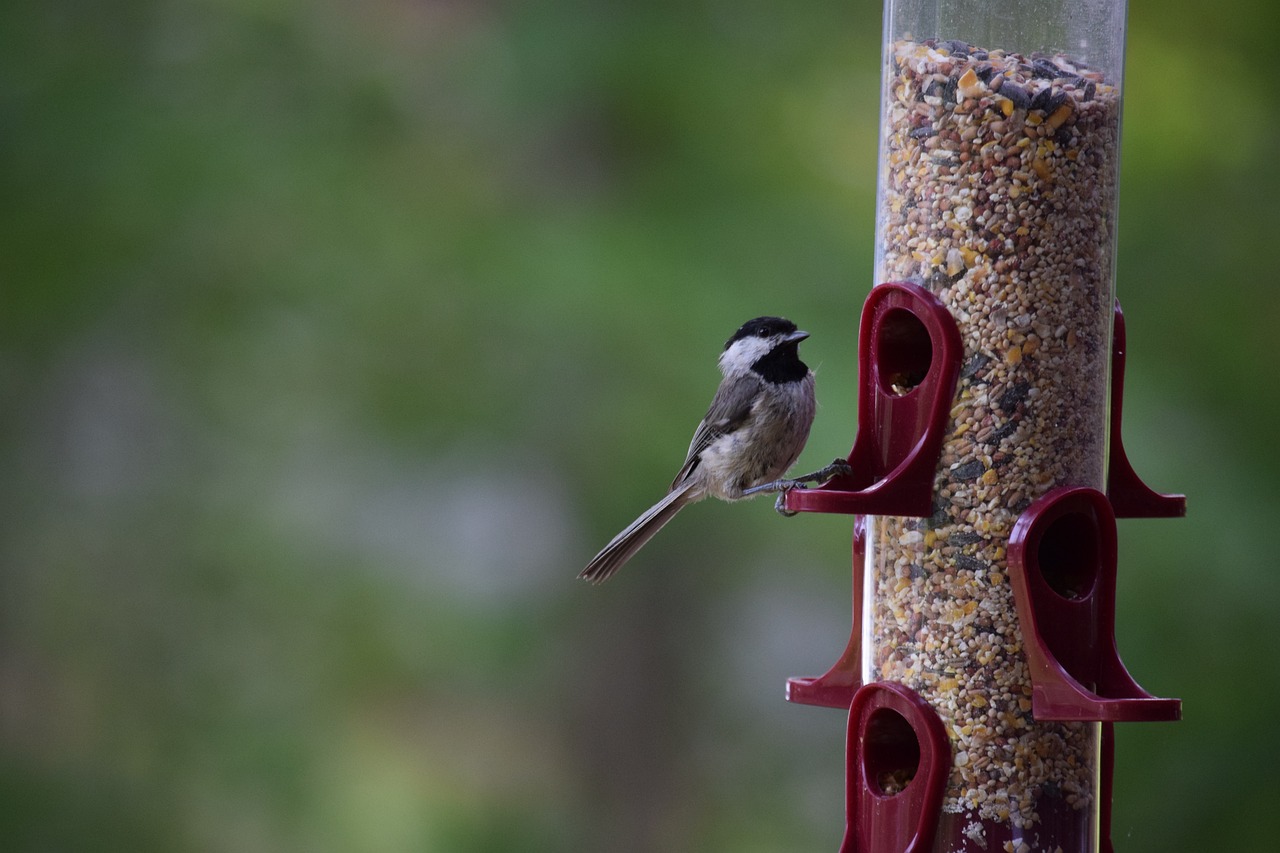
8. Repurposed Plastic Bottle Bird Feeder
Looking to attract more feathered friends to your garden while also reducing plastic waste? Why not create a repurposed plastic bottle bird feeder as a fun and eco-friendly DIY project! By upcycling a simple plastic bottle, you can provide a sustainable food source for birds in your area while adding a touch of creativity to your outdoor space.
To make your own plastic bottle bird feeder, start by selecting a clean and sturdy plastic bottle. You can use any size or shape depending on your preference. Cut out small holes near the bottom of the bottle to allow birds to access the birdseed inside. Make sure the holes are large enough for the birds to comfortably reach the seeds.
Next, create perches for the birds by attaching small wooden dowels or sticks below each hole. This will give the birds a place to comfortably rest while they enjoy their meal. You can also add a larger perch or platform at the bottom of the bottle for birds that prefer to feed from a stable surface.
Fill the plastic bottle with birdseed of your choice, making sure not to overfill to prevent wastage. Hang the feeder from a tree branch, hook, or any outdoor structure using a durable string or wire. Ensure that the feeder is securely fastened to prevent it from falling and spilling the seeds.
Your repurposed plastic bottle bird feeder is now ready to attract a variety of bird species to your garden. Sit back, relax, and enjoy watching the colorful visitors as they feast from your eco-friendly creation. Not only are you providing a source of food for the birds, but you are also contributing to a cleaner environment by repurposing plastic waste into a functional and decorative piece.

9. Recycled Fabric Rag Rug
Creating a Recycled Fabric Rag Rug is a wonderful way to breathe new life into old fabric scraps that would otherwise go to waste. This eco-friendly DIY project not only helps reduce textile waste but also results in a colorful and unique floor covering for your home. By braiding or weaving together different fabric pieces, you can craft a cozy and visually appealing rug that adds a touch of warmth and sustainability to any room.
To start this project, gather an assortment of fabric scraps in various colors and textures. Old t-shirts, bed sheets, or fabric remnants can all be used to create a vibrant rag rug. Cut the fabric into strips of equal width and length, ensuring they are long enough to braid or weave together. You can mix and match different fabrics to achieve a patchwork effect or stick to a single color scheme for a more cohesive look.
Once you have your fabric strips ready, begin braiding or weaving them together to form the base of your rug. Braiding is a simple technique where you intertwine three strips of fabric together, while weaving involves creating a tight, interlocking pattern. Experiment with different braiding and weaving styles to achieve the desired texture and thickness for your rug.
As you continue to braid or weave, gradually shape the fabric into a circular or rectangular rug, depending on your preference. You can create a small accent rug for a specific area or a larger rug to cover more floor space. The beauty of a fabric rag rug lies in its imperfections and handmade charm, so embrace the unique quirks and variations that arise during the crafting process.
Once your rug reaches the desired size, secure the ends of the fabric strips by knotting or stitching them together to prevent unraveling. Trim any excess fabric to create a neat and tidy finish. Finally, give your recycled fabric rag rug a thorough wash to clean and soften the fabric, enhancing its cozy appeal and ensuring durability for long-term use.
Place your newly crafted rag rug in a prominent spot in your home, such as the entryway, living room, or bedroom, to showcase your creativity and sustainable design sensibilities. Not only does this DIY project add a personal touch to your decor, but it also serves as a constant reminder of the beauty that can be created from repurposed materials.
Frequently Asked Questions
- Can I customize these DIY projects to fit my personal style?
Absolutely! One of the best things about DIY projects is the ability to add your own creative touch. Feel free to experiment with different colors, patterns, and materials to match your unique style.
- Are these projects suitable for beginners?
Yes, these DIY projects are designed to be beginner-friendly, requiring minimal tools and skills. They are a great way to start your crafting journey and unleash your creativity without feeling overwhelmed.
- How can I source the recycled materials needed for these projects?
You can easily find most of the materials for these projects around your home or by asking friends and family to save items for you. Thrift stores, garage sales, and online marketplaces are also great places to find inexpensive or free recycled materials.
- Are these projects environmentally friendly?
Yes, these DIY projects promote sustainability by repurposing items that would otherwise end up in landfills. By using recycled materials, you are not only reducing waste but also creating unique and eco-conscious creations.
- Can children participate in these DIY projects?
Many of these projects can be adapted for children with adult supervision. It's a fantastic way to introduce kids to the concept of upcycling and encourage them to think creatively while having fun crafting together.