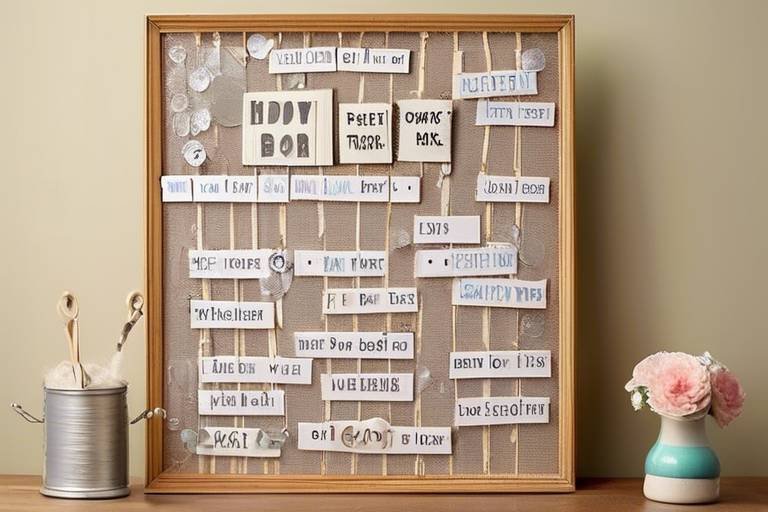
How to Make Your Own Decorative Message Board
Are you looking to add a personal touch to your living or workspace? Creating your own decorative message board can be a fun and rewarding DIY project that not only serves a practical purpose but also enhances the aesthetic appeal of the room. Let's dive into the step-by-step process of crafting a stylish message board that reflects your unique style and organizational needs.
First and foremost, gather all the necessary supplies to kickstart your creative endeavor. You will need a frame, corkboard or magnetic board, fabric or paint, glue, and various decorative elements like ribbons or buttons to add a touch of charm to your board.
Once you have gathered your materials, it's time to decide on a design theme for your message board. Whether you prefer a rustic look, a modern vibe, a vintage feel, or a color-coordinated palette, choosing a design scheme will set the tone for the entire project and ensure a cohesive and visually appealing result.
With your design theme in mind, prepare the board surface by cleaning it thoroughly and cutting it to fit the frame if necessary. Ensuring that the board is smooth and prepped will provide a solid foundation for the decorative elements that will be added in the following steps.
Next, it's time to add the fabric or paint to your board. Whether you opt to cover the board with fabric secured in place with glue or staples, or paint the surface in a color that complements your design theme, allowing the fabric to dry completely before proceeding is crucial for a polished finish.
Enhance the frame of your message board with a touch of creativity by painting it, adding embellishments, or incorporating decorative trim that complements the overall design of the board. This step adds a personalized flair to your message board and ties the entire look together.
Secure the prepared board into the frame using glue, nails, or screws to ensure it is firmly in place and centered within the frame. This step not only provides a professional finish to your message board but also ensures its durability and longevity.
Personalize your message board with accessories such as hooks, clips, or pockets that cater to your organizational needs and personal style. These additions will allow you to hang keys, notes, or other small items on your board, keeping everything organized and easily accessible.
Finally, hang your completed decorative message board in a prominent location within your home or office, such as the kitchen, home office, or entryway. Start using it to display reminders, photos, and mementos, adding a touch of charm and functionality to your space while showcasing your creative handiwork.
Gather Supplies
When embarking on the journey of creating your very own decorative message board, the first step is to gather all the necessary supplies. This project requires a few key materials to bring your vision to life and add a personalized touch to your space. The essential supplies include a frame, a corkboard or magnetic board, fabric or paint, glue, and decorative elements like ribbons or buttons.
Before diving into the creative process, it's crucial to ensure you have all the supplies at hand to avoid interruptions and delays. Having everything ready will streamline the crafting experience and allow you to focus on the fun part - designing your unique message board.
Choose a Design Theme
When it comes to creating your own decorative message board, one of the most exciting steps is choosing a design theme that reflects your personal style and complements your space. Your design theme sets the tone for the entire project, so it's essential to consider the overall look and feel you want to achieve. Are you drawn to a rustic aesthetic with natural elements and earthy tones, or do you prefer a modern and sleek design with clean lines and bold colors?
Perhaps you are inspired by vintage charm and nostalgia, incorporating lace, distressed finishes, and antique accents into your message board design. Alternatively, you may opt for a theme based on a specific color palette, such as calming blues and greens for a serene vibe or vibrant yellows and oranges for a lively touch.
Choosing a design theme allows you to create a cohesive and visually appealing message board that not only serves a practical purpose but also enhances the overall aesthetic of your home or office. It's like selecting the perfect outfit for a special occasion – each element should complement one another to create a harmonious and stylish look.
Prepare the Board
When it comes to creating your own decorative message board, one of the crucial steps is preparing the board itself. This process sets the foundation for the overall look and functionality of your final product. Before diving into the creative aspects, it's essential to ensure that the board is in optimal condition for the decorative elements to adhere securely.
Start by selecting a board that fits the dimensions of your chosen frame, whether it's a corkboard or a magnetic board. If needed, trim the board to the correct size using appropriate tools to achieve a perfect fit. Smooth out any rough edges or surfaces to create a seamless base for the upcoming design enhancements.
Once the board is trimmed and prepped, it's time to consider the surface texture. Depending on your design preference, you can opt to keep the original texture of the board or cover it with fabric for a softer look. If choosing fabric, ensure it is securely attached using glue or staples, providing a clean and wrinkle-free finish.
If you prefer a painted surface, select a color that complements your overall design theme. Apply the paint evenly, allowing it to dry completely before moving on to the next steps. A well-painted board can serve as a versatile backdrop for various decorative elements and personal touches.
Before proceeding with the decorative phase, double-check that the board is firmly secured within the frame. This step is crucial to prevent any shifting or misalignment once the board is in use. Whether using glue, nails, or screws, make sure the attachment is stable and centered within the frame for a professional and polished appearance.
Add Fabric or Paint
When it comes to adding fabric or paint to your DIY decorative message board, you have the opportunity to truly personalize and enhance its appearance. Whether you choose to cover the board with fabric or give it a fresh coat of paint, this step will set the foundation for the overall look of your message board.
If you opt for fabric, consider selecting a material that complements your design theme and color scheme. You can use a solid color for a sleek and modern look, or choose a patterned fabric to add visual interest and texture. Secure the fabric to the board using glue or staples, ensuring a smooth and wrinkle-free finish.
On the other hand, painting the board allows you to customize the color to perfectly match your decor. Choose a paint color that harmonizes with the overall aesthetic you want to achieve. Consider using a high-quality paint that will provide a durable and long-lasting finish. Allow the paint to dry completely before moving on to the next steps of the project.
If you're feeling adventurous, you can even combine fabric and paint to create a unique and eye-catching message board. For example, you could paint the board in a neutral color and then add a fabric border or accent to bring in a pop of pattern or color.
Remember, the fabric or paint you choose will set the tone for the entire message board, so take your time and experiment with different options until you achieve the look you desire. This is your chance to let your creativity shine and make a statement with your personalized decor piece.
Decorate the Frame
When it comes to decorating the frame of your personalized message board, this is your chance to truly make it stand out and reflect your unique style. Think of the frame as the border of a masterpiece, enhancing the overall aesthetic appeal of the board. Whether you choose to paint it in a bold color, add intricate designs, or attach decorative elements, this step is where you can let your creativity shine.
One popular way to decorate the frame is by painting it to complement the design theme of the board. You can opt for a solid color that contrasts with the board or choose a subtle shade that blends harmoniously. Consider using multiple colors for a more vibrant look, or even create patterns such as stripes or polka dots to add a playful touch.
If painting isn't your style, you can also embellish the frame with decorative trim such as ribbons, beads, or buttons. These small details can add texture and visual interest to the frame, elevating the overall appearance of the message board. Imagine each trim as a piece of jewelry adorning your creation, adding that extra flair that sets it apart.
Another creative idea is to use stencils to create intricate designs on the frame. This allows you to add intricate patterns or images that tie in with the theme of the board. Whether you prefer floral motifs, geometric shapes, or whimsical illustrations, stenciling offers a precise and professional-looking way to decorate the frame.
For those who enjoy a more rustic or vintage look, distressing the frame can add character and charm to your message board. You can achieve this by sanding the edges, applying a wash of paint, or using techniques like crackling or antiquing to give the frame a weathered appearance. This method can create a sense of history and nostalgia, making your board feel like a cherished heirloom.
Remember, the frame is not just a border but an integral part of the overall design of your decorative message board. By taking the time to decorate it thoughtfully, you can elevate the entire look and create a piece that not only serves a practical purpose but also serves as a beautiful and unique decor element in your space.
Attach the Board to the Frame
When it comes to attaching the board to the frame in your DIY decorative message board project, precision and care are key. This step is crucial in ensuring that your final product looks polished and professional. Whether you choose to use glue, nails, or screws, the method you select should securely hold the board in place while also aligning it perfectly within the frame.
If you opt for glue, make sure to use a strong adhesive that is suitable for both the board material and the frame. Apply the glue evenly along the edges of the board before carefully pressing it into the frame. Allow sufficient time for the glue to dry completely to avoid any shifting or loosening of the board.
Alternatively, using nails or screws can provide added stability to the attachment. Predrill small holes in the frame to prevent splitting, then gently hammer in nails or screw in screws to secure the board. Be mindful of the placement of the fasteners to maintain a neat and tidy appearance.
Ensuring that the board is centered within the frame is essential for achieving a balanced and harmonious look. Take measurements and make adjustments as needed to guarantee that the board is positioned correctly before finalizing the attachment. A well-aligned board will contribute to the overall aesthetic appeal of your message board.
Once the board is securely attached to the frame, give it a gentle shake to test its stability. If there is any wobbling or shifting, reinforce the attachment with additional glue, nails, or screws as necessary. Taking the time to double-check the security of the board will prevent any unexpected mishaps in the future.
Personalize with Accessories
When it comes to personalizing your decorative message board, the options are endless. Adding accessories is a fun and creative way to make your board not only functional but also uniquely yours. Consider incorporating hooks, clips, or pockets to hang keys, notes, or other small items. These additions not only enhance the board's practicality but also add a touch of personal style.
Think about the overall theme and purpose of your message board when selecting accessories. Are you aiming for a more organized look with labeled hooks for keys and clips for notes? Or perhaps you want a more eclectic feel with a mix of different accessories like decorative push pins and fabric pockets. Whatever your style, the accessories you choose can truly make the board your own.
If you're someone who loves to change up your decor frequently, opt for accessories that are easily interchangeable. This way, you can update the look of your message board without having to redo the entire design. Consider using magnetic accessories that can be easily swapped out or hooks that can be rearranged to suit your changing needs.

Display and Enjoy
Once you have completed the creation of your decorative message board, it's time to proudly display and enjoy the fruits of your labor. Hang your personalized message board in a location that is easily visible and accessible, such as your kitchen, home office, or entryway. By choosing a prominent spot, you not only make use of its practical function but also elevate the aesthetic appeal of the space.
As you begin to use your message board, consider the various ways you can make it a functional and decorative element in your home or office. Use it to display important reminders, such as grocery lists or appointment schedules, keeping them within easy reach and organized. You can also use the board to showcase photos of loved ones, postcards from travels, or inspirational quotes that uplift your spirits.
By incorporating hooks, clips, or pockets onto the message board, you can further personalize its utility to suit your specific needs. Hang keys, small accessories, or notes securely in place, ensuring that everything stays organized and within reach. This customization not only adds practicality but also enhances the overall charm and character of your message board.
Moreover, the decorative elements and design choices you made during the creation process will now come to life as the message board takes its place in your home. The colors, patterns, and textures you selected will blend harmoniously with your existing decor, creating a cohesive and visually appealing focal point in the room.
Every time you glance at your personalized message board, you'll be reminded of the time and effort you put into crafting it, adding a sense of pride and accomplishment to your daily routine. Its presence will not only serve a functional purpose but also bring a touch of personality and style to your living or working space.
Frequently Asked Questions
- What materials do I need to make a decorative message board?
To make a decorative message board, you will need a frame, corkboard or magnetic board, fabric or paint, glue, and decorative elements like ribbons or buttons.
- How do I choose a design theme for my message board?
You can choose a design theme for your message board based on your personal style, such as rustic, modern, vintage, or themed around a specific color palette to ensure a cohesive look.
- How do I attach the board to the frame?
You can attach the prepared board to the frame using glue, nails, or screws, ensuring it is firmly in place and centered within the frame for a polished finish.
- Where should I hang my completed message board?
You can hang your completed decorative message board in a prominent location, such as a kitchen, home office, or entryway, to display reminders, photos, and mementos while adding charm to your space.