How to Make Your Own Decorative Wall Shelves
Have you ever looked at your plain walls and thought they could use a little something extra? Well, why not try your hand at making your own decorative wall shelves? Not only will this add a personal touch to your home decor, but it will also give you a sense of accomplishment every time you gaze upon your creation.
Before diving into this creative project, it's essential to gather all the necessary materials and tools. Make sure you have wood that suits your desired design, screws, a drill, paint for finishing touches, and a measuring tape to ensure precision in your DIY endeavor.
When it comes to choosing a design for your decorative wall shelves, the possibilities are endless. You can opt for sleek floating shelves for a modern look, geometric shapes for a contemporary feel, or rustic wood for a cozy touch that complements your home's aesthetic.
Once you have settled on a design, the next step is to measure and cut the wood pieces accordingly. Accuracy is key here, as even the slightest discrepancy can affect the overall look and functionality of your shelves. Take your time with this step to ensure a perfect fit.
Assembling the shelves is where the magic happens. Follow the step-by-step instructions carefully, using screws, nails, or wood glue to securely join the pieces together. This process requires patience and precision, but the end result will be well worth the effort.
To truly make your decorative wall shelves stand out, consider adding some decorative touches. Whether it's a pop of color with paint, a touch of elegance with stain, or unique elements like wallpaper or stencils, these details will elevate the look of your shelves and make them uniquely yours.
Mounting the shelves securely is crucial for both safety and stability. Depending on the design and weight of your shelves, you may need brackets, anchors, or a French cleat to ensure they stay firmly in place. Take the time to install them correctly to avoid any mishaps.
Once your shelves are up, it's time to get creative with arranging and styling them. Experiment with different layouts and display items that reflect your personality, whether it's potted plants, favorite books, cherished photos, or other decorative pieces that showcase your style.
Lastly, don't forget to maintain and refresh your decorative wall shelves regularly. Keep them clean and organized to maintain their visual appeal, and consider updating their look with seasonal decor or new accents to keep things interesting and fresh.
Gather Materials and Tools
Learn how to create unique and stylish decorative wall shelves to add a personal touch to your home decor.
When embarking on the journey of creating your own decorative wall shelves, the first step is to gather all the necessary materials and tools for your DIY project. You will need items such as high-quality wood, screws, a reliable drill, paint in your desired color, and a measuring tape to ensure precision in your measurements.
Imagine your project as a recipe - each material and tool playing a crucial role in the final outcome. Just like a chef needs the right ingredients and utensils to create a delicious dish, you need the proper materials and tools to craft beautiful and functional wall shelves.
Before you start, make sure you have everything you need within reach. It's like preparing all your ingredients before cooking a meal - having everything organized will make the process smoother and more enjoyable. So, gather your materials like a skilled chef gathering their ingredients before starting to cook.
Creating your own decorative wall shelves is not just about assembling pieces of wood; it's about crafting a piece of art that reflects your style and personality. So, take your time in selecting the best materials and tools that will bring your vision to life. Remember, the quality of your materials and tools will greatly impact the final result, just like using fresh and high-quality ingredients in a recipe.
Once you have all your materials and tools ready, you are one step closer to creating stunning decorative wall shelves that will elevate the aesthetic of your living space. So, gather your supplies, roll up your sleeves, and get ready to embark on a creative and fulfilling DIY project!

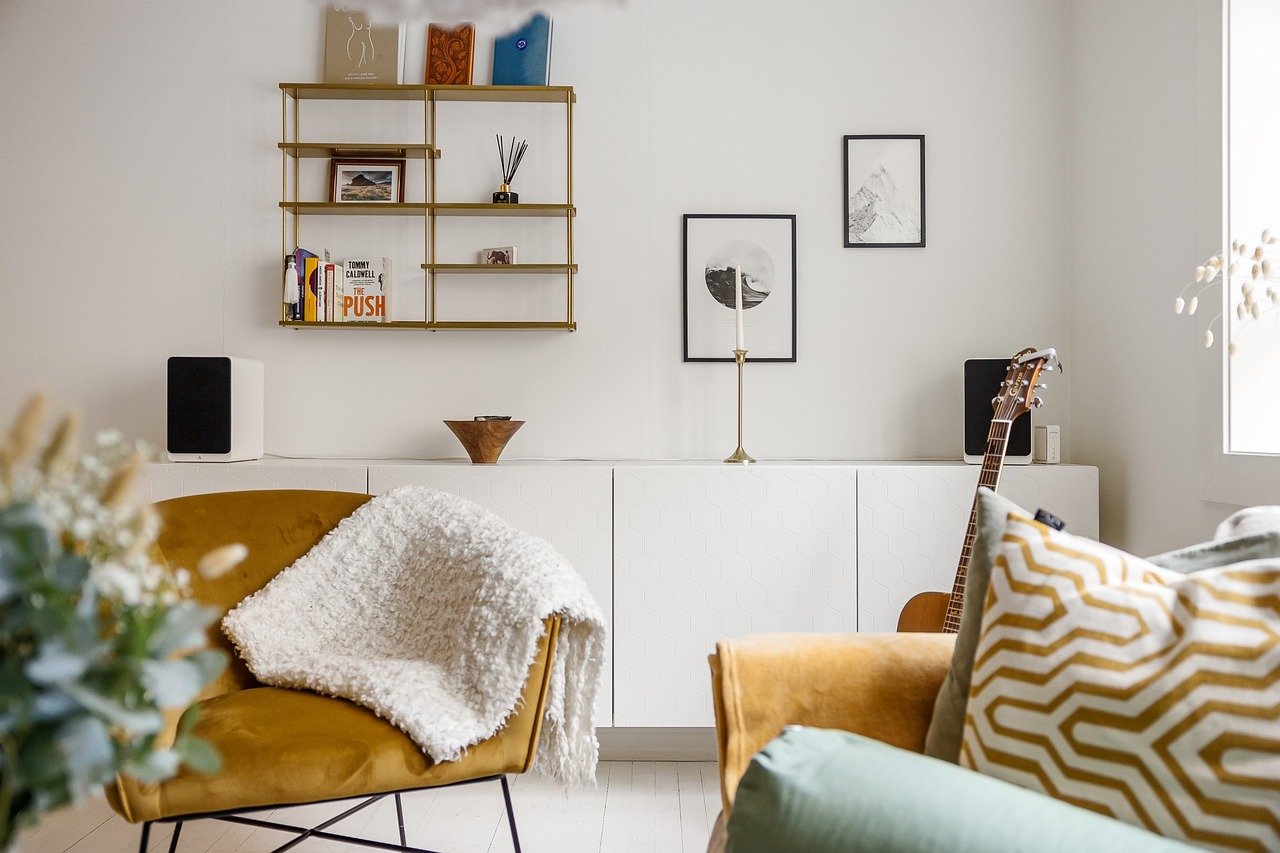
Choose a Design
When it comes to creating your own decorative wall shelves, the design you choose plays a crucial role in the overall aesthetic of your space. Whether you prefer a modern, minimalist look or a more traditional and rustic feel, selecting the right design is essential to achieving the desired outcome.
One popular design choice for decorative wall shelves is the floating shelves. These sleek and contemporary shelves create the illusion of a floating effect, adding a touch of elegance to any room. They are versatile and can complement various decor styles, making them a popular choice among homeowners looking for a clean and modern look.
If you are drawn to geometric shapes and patterns, consider incorporating shelving units with unique angles and lines. Geometric shelves can add visual interest to your walls and serve as a statement piece in your home decor. They are perfect for those who want to infuse a touch of creativity and personality into their living spaces.
For a more rustic and natural look, opt for shelves made from reclaimed or distressed wood. These shelves exude warmth and charm, bringing a cozy and inviting feel to any room. Rustic wood shelves are perfect for creating a farmhouse-style ambiance or adding a touch of nature-inspired decor to your home.
When choosing a design for your decorative wall shelves, consider the overall theme and style of your home. Whether you prefer a contemporary, eclectic, or traditional look, selecting shelves that complement your existing decor will help tie the room together and create a cohesive aesthetic.
Measure and Cut Wood
When it comes to creating your own decorative wall shelves, one of the crucial steps is to measure and cut the wood accurately. This process ensures that your shelves fit perfectly and look professionally crafted. Before diving into this task, gather all the necessary materials and tools such as wood planks, a measuring tape, a pencil, and a saw. Having everything ready will streamline the process and prevent any interruptions.
Start by measuring the dimensions needed for your shelves based on the design you have chosen. Whether you opt for simple straight shelves or intricate geometric shapes, precise measurements are key to achieving a polished end result. Remember the saying, "measure twice, cut once," to avoid any mistakes that could lead to uneven or misaligned shelves.
Once you have the measurements, carefully mark the wood planks using a pencil before cutting. Double-check the markings to ensure they align with your design plan. When cutting the wood, use a saw that is suitable for the thickness of the material to achieve clean and straight edges. Take your time during this step to guarantee accuracy.
If you are creating multiple shelves, it's essential to maintain consistency in the measurements and cuts to ensure uniformity across all pieces. A small deviation in size can be noticeable when the shelves are mounted on the wall, so precision is key. Consider creating a template or guide to assist with the cutting process and maintain uniformity.
After cutting the wood pieces, sand the edges to smooth out any rough surfaces and remove splinters. This step not only enhances the appearance of the shelves but also makes them safer to handle. Pay attention to details during the sanding process to achieve a professional finish that is ready for painting, staining, or varnishing.

Assemble the Shelves
When it comes to assembling your decorative wall shelves, precision and patience are key. Begin by laying out all the pieces you have cut and ensuring you have the necessary tools at hand. It's like putting together a complex puzzle, but with the satisfaction of creating something functional and beautiful for your home.
Start by following the instructions provided in your chosen design plan. Whether you are building floating shelves, geometric shapes, or a more traditional style, each step is crucial to the stability and overall look of the shelf. Think of it as building a sturdy foundation for a house – each piece plays a vital role in the final structure.
As you begin assembling, make sure to secure the pieces together firmly. Depending on the design, you may need screws, nails, or wood glue to hold everything in place. It's like connecting the dots, ensuring that each connection is strong and secure for a lasting finish.
If you encounter any difficulties during the assembly process, don't hesitate to refer back to your design plan or seek online tutorials for guidance. Sometimes a fresh perspective or expert advice can make all the difference in creating a seamless and professional-looking shelf.
Once all the pieces are assembled, take a step back and admire your handiwork. You've transformed simple materials into a functional and aesthetically pleasing addition to your home decor. It's like witnessing a masterpiece come together, with each element contributing to the overall beauty of the final product.

Add Decorative Touches
When it comes to adding decorative touches to your DIY wall shelves, the possibilities are endless. One popular option is to paint the shelves in a color that complements your existing decor scheme. Whether you prefer a bold pop of color or a subtle neutral tone, a fresh coat of paint can instantly transform the look of your shelves.
Another way to enhance the aesthetic appeal of your wall shelves is by staining the wood. Stain can bring out the natural beauty of the wood grain and add a touch of sophistication to your shelves. Choose a stain color that harmonizes with the overall style of your space for a cohesive look.
If you're feeling creative, consider adding decorative elements to your shelves. This could include applying wallpaper to the back panel of the shelf for a pop of pattern, or using stencils to create a custom design. These small details can make a big impact and showcase your unique style.
For a more rustic or industrial look, you may want to consider distressing your shelves. This technique involves creating a weathered or aged appearance by sanding down the edges and corners of the wood. Distressed shelves can add character and charm to your space.
Additionally, hardware can play a significant role in the overall design of your decorative wall shelves. Choose decorative brackets or unique hardware to add a touch of personality to your shelves. The right hardware can elevate the look of your shelves and tie together the entire room.
Mount the Shelves
When it comes to mounting your newly crafted decorative wall shelves, ensuring proper installation is crucial for both safety and aesthetics. The method you choose will depend on the weight of the shelves and the type of wall they will be mounted on. Let's delve into the various ways you can securely mount your shelves to create a stunning display in your living space.
If you're opting for floating shelves, consider using hidden brackets for a seamless look. These brackets can be attached to the wall studs for maximum support while giving the illusion that the shelves are floating. This method works well for lightweight items and adds a modern touch to your decor.
For heavier shelves or if you want extra stability, using wall anchors is a reliable choice. Wall anchors are suitable for drywall and can support more weight compared to standard screws. Make sure to choose anchors that can hold the weight capacity of your shelves to prevent any accidents.
Another popular mounting option is the French cleat system, which provides excellent support and easy installation. The cleat consists of two interlocking pieces - one attached to the wall and the other to the shelf - creating a secure connection. This method is ideal for larger or bulkier shelves that require strong support.
Before mounting your shelves, always use a level to ensure they are straight and evenly spaced. Uneven shelves can throw off the entire look of your display, so taking the time to measure and align them correctly is essential. Additionally, consider the height at which you want to place the shelves to create a visually appealing arrangement.
Once your shelves are securely mounted, take a step back and admire your handiwork. The way you showcase your decorative items on the shelves can elevate the overall look of the room. Experiment with different layouts, mix and match items, and play with varying heights to create a visually dynamic display that reflects your personal style.

Arrange and Style
When it comes to arranging and styling your decorative wall shelves, the possibilities are endless. Think of your shelves as a blank canvas waiting to be adorned with your favorite items and decor pieces. Consider mixing and matching different elements to create a visually appealing display that reflects your personality and style.
Start by selecting a focal point for each shelf. Whether it's a statement piece of art, a vibrant plant, or a collection of vintage books, choose something that will draw the eye and anchor the arrangement. From there, layer in complementary items such as smaller decor pieces, trinkets, or framed photos to add depth and interest.
Creating visual balance is key to a well-styled shelf. Play around with varying heights, textures, and colors to achieve a harmonious look. For example, pair tall vases with shorter candles, mix in metallic accents with natural elements like wood or greenery, and alternate between bold hues and neutral tones for a dynamic display.
Don't be afraid to experiment with different configurations until you find the perfect arrangement. Try leaning artwork against the back of the shelf, stacking books both vertically and horizontally, or using decorative boxes and baskets to corral smaller items. Remember, styling your shelves is a creative process, so trust your instincts and have fun with it!

Maintain and Refresh
Once you have successfully created and installed your decorative wall shelves, it is essential to maintain them to ensure they stay in top condition and continue to enhance your home decor. Regular maintenance not only keeps your shelves looking their best but also prolongs their lifespan. Here are some tips on how to maintain and refresh your decorative wall shelves:
Clean Regularly: Dust and dirt can accumulate on your shelves over time, so it's important to dust them regularly with a soft cloth or a duster. For stubborn stains, you can use a mild soap solution and a damp cloth to gently wipe the shelves clean.
Inspect for Damage: Periodically check your shelves for any signs of damage such as cracks, chips, or loose screws. Repair any issues promptly to prevent further damage and ensure the structural integrity of the shelves.
Organize and Declutter: Keep your shelves organized by arranging items neatly and decluttering regularly. Avoid overloading the shelves with heavy items to prevent damage and maintain their aesthetic appeal.
Update with Seasonal Decor: Refresh the look of your decorative wall shelves by incorporating seasonal decor elements such as holiday ornaments, seasonal flowers, or themed decorations. This simple update can instantly change the vibe of your space.
Rotate Display Items: To prevent your shelves from looking monotonous, consider rotating the display items periodically. This allows you to showcase different pieces and keeps the decor fresh and interesting.
Consider Repainting or Refinishing: If you feel like your shelves need a new look, consider repainting or refinishing them. A fresh coat of paint or a new finish can completely transform the appearance of your shelves and give them a new lease on life.
By following these maintenance and refresh tips, you can ensure that your decorative wall shelves remain a focal point in your home decor and continue to reflect your personal style.
Frequently Asked Questions
- Can I use any type of wood for making decorative wall shelves?
Yes, you can use various types of wood such as pine, oak, or maple depending on your preference and the desired look of the shelves. Each type of wood will give a different finish, so choose one that suits your style and budget.
- Do I need to have prior woodworking experience to make decorative wall shelves?
No, you don't need to be a woodworking expert to create decorative wall shelves. Basic skills like measuring, cutting, and assembling are sufficient for this DIY project. There are plenty of tutorials and guides available to help you through the process.
- How can I ensure that the decorative wall shelves are securely mounted?
To ensure the shelves are securely mounted, make sure to use appropriate hardware such as brackets, anchors, or a French cleat. It's essential to follow the installation instructions carefully and double-check the stability of the shelves before placing any items on them.
- Can I paint or stain the decorative wall shelves to match my home decor?
Absolutely! Painting or staining the shelves is a great way to customize them to fit your home decor style. Choose colors or finishes that complement the room where the shelves will be placed to create a cohesive look.