How to Make Your Own Custom Serving Tray
Creating a personalized serving tray is a fantastic way to add a touch of uniqueness to your home decor or to create a heartfelt gift for someone special. By following these steps, you can craft a custom serving tray that is both functional and stylish.
Gathering the necessary materials and tools is the first step in this DIY project. You will need wood for the base, handles for easy carrying, paint or stain for a decorative finish, sandpaper to smooth out rough edges, and a saw to cut the wood to size.
Next, it's time to unleash your creativity and choose the design for your serving tray. Whether you prefer a classic look or a more modern style, consider adding personal touches such as patterns, colors, or even a monogram to make it truly unique.
Once you have decided on the design, carefully measure and cut the wood pieces to fit your chosen dimensions. Accuracy is key here, so take your time to ensure that the pieces fit together perfectly.
Assembling the tray is where the magic happens. Use wood glue and nails or screws to securely join the wooden pieces together, forming the base of your serving tray. Make sure the joints are tight and sturdy.
After assembling, it's time to sand down any rough edges and surfaces to create a smooth finish. Applying a coat of paint, stain, or varnish will not only protect the wood but also enhance its natural beauty.
Adding handles to the sides of the serving tray is both practical and aesthetically pleasing. Choose handles that complement your design and make it easier to transport your custom creation.
For an extra special touch, consider personalizing your serving tray with decorative elements like stenciled designs, decals, or a resin finish. These details will make your tray stand out and truly reflect your style.
Once your custom serving tray is complete, it's time to showcase your handiwork. Display it proudly in your home or gift it to a loved one for a truly meaningful present. Enjoy the satisfaction of creating something beautiful with your own hands!

Gather Materials and Tools
When embarking on the journey of creating your own custom serving tray, the first step is to gather all the necessary materials and tools. You will need a selection of wood, handles for easy carrying, paint or stain for a personalized finish, sandpaper for smoothing out rough edges, and a saw for cutting the wood to your desired dimensions.
Before starting the project, it's essential to ensure you have all the supplies at hand to avoid interruptions during the crafting process. Having everything prepared and organized will streamline the creation of your custom serving tray and make the experience more enjoyable.
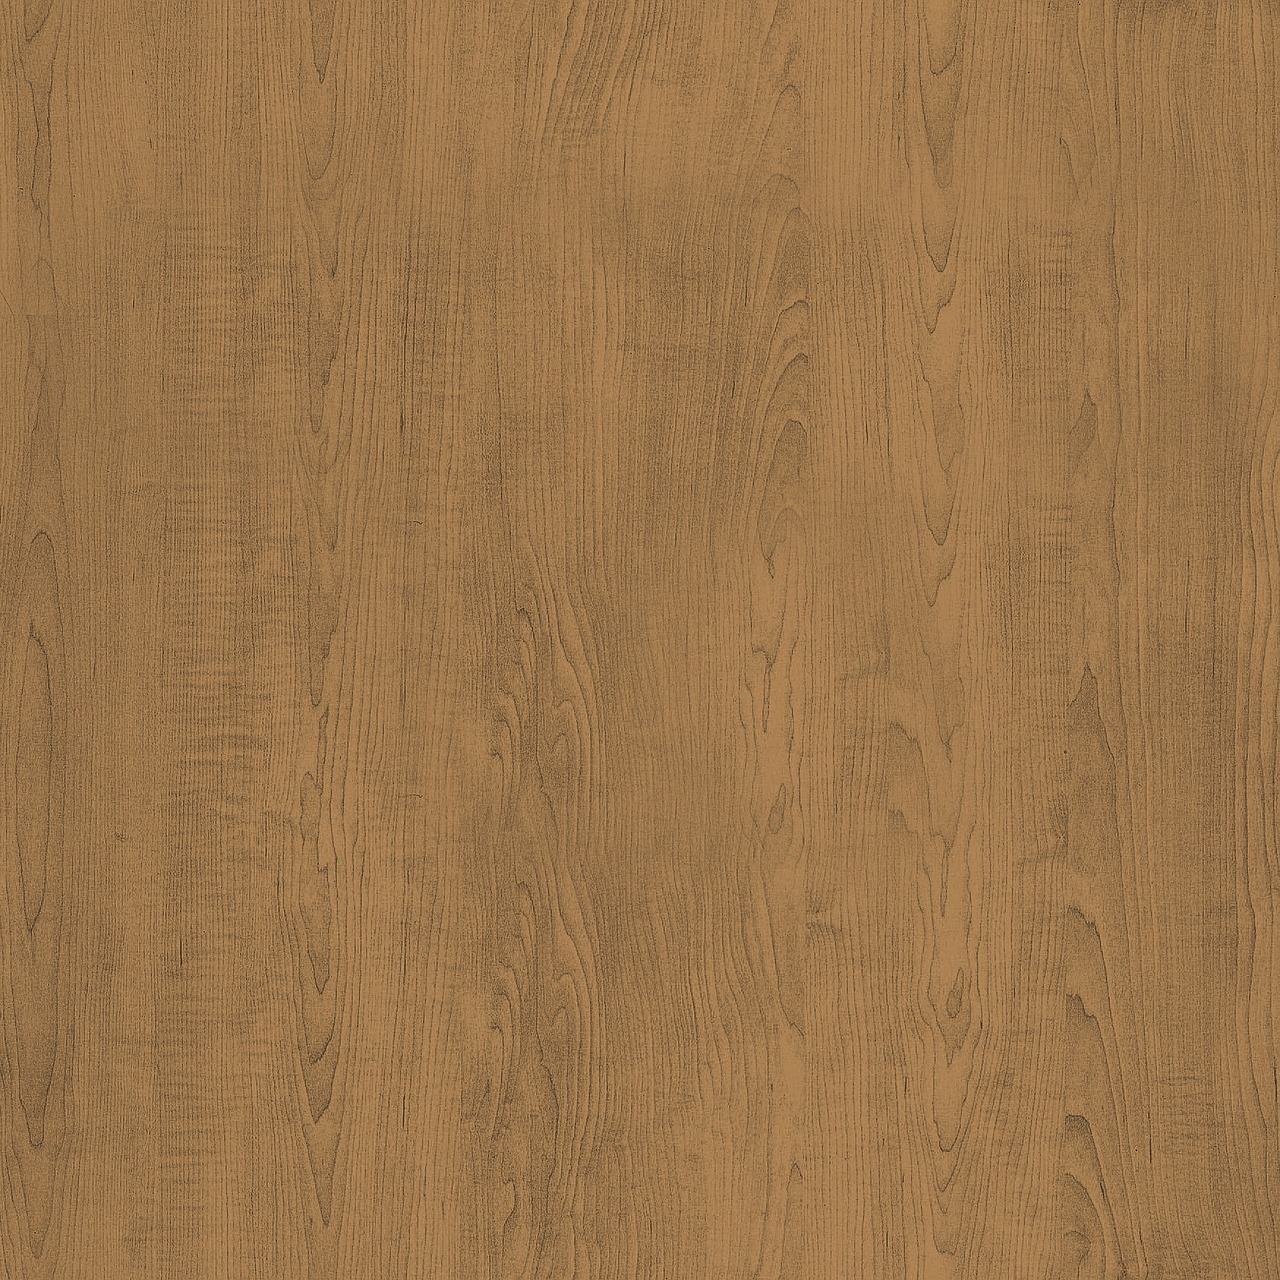
Consider the type of wood you want to use for your tray, as different woods offer varying aesthetics and durability. Additionally, select handles that not only complement the design of your tray but also provide functionality for serving purposes.
When choosing paint or stain, think about the overall look you want to achieve. Whether you prefer a rustic, natural finish or a vibrant pop of color, the choice of paint or stain can significantly impact the final appearance of your serving tray.
Having sandpaper on hand is crucial for refining the wood surface and ensuring a smooth, professional finish. This step is essential for creating a polished end product that is both visually appealing and safe to use.
Lastly, having a saw available for cutting the wood to the required dimensions is essential for precision and accuracy in crafting your custom serving tray. If you are not comfortable using a saw, many hardware stores offer wood cutting services to help you achieve the perfect pieces for your project.

Choose Your Design
When it comes to creating your own custom serving tray, one of the most exciting steps is choosing the design. This is where you get to let your creativity shine and make your serving tray truly unique. Think about the style and size you want for your tray – do you prefer a sleek and modern look, or maybe something more rustic and traditional? Consider how you can personalize your design with patterns, colors, or even a monogram to add a special touch.
Imagine your serving tray as a blank canvas waiting to be transformed into a work of art. Just like choosing the perfect outfit or decorating your living space, selecting the design for your serving tray is a chance to express your personality and taste. Whether you opt for a bold and eye-catching design or a subtle and elegant one, the choice is yours. Think about how your serving tray will fit into your home decor or the recipient's style if it's a gift.
It's like picking the right ingredients for a recipe – each element contributes to the overall flavor and presentation. Your design choices will set the tone for the entire project, so take your time and enjoy the process. Consider how different colors and patterns can evoke different moods or feelings. Maybe you want to create a serving tray that reflects the vibrancy of spring or the coziness of winter. Let your imagination run wild and see where it takes you.
Measure and Cut the Wood
When it comes to creating a custom serving tray, one of the crucial steps is measuring and cutting the wood. This step requires precision and accuracy to ensure that your tray turns out just as you envisioned. Before you begin, gather all the necessary tools such as a saw, measuring tape, and safety equipment to make the process smoother.
Start by measuring the wood pieces according to the design and dimensions you have chosen for your serving tray. Use a measuring tape to mark the cutting points accurately, ensuring that each piece fits perfectly when assembled. Remember the old saying, "measure twice, cut once," to avoid any mistakes that could impact the final result.
Once you have marked the measurements, carefully cut the wood using a saw. Take your time to follow the lines precisely and use steady hands to create clean and straight cuts. If you are not confident in your cutting skills, consider having the wood pieces cut at a hardware store to guarantee professional and accurate results.
After cutting the wood pieces, double-check the dimensions to ensure they match your design specifications. It's essential to have uniform and consistent sizes for all the pieces to maintain the structural integrity of the serving tray. Any discrepancies in measurements could lead to gaps or uneven edges when assembling the tray.
As you work on cutting the wood, pay attention to details and take pride in the craftsmanship of your project. Each precise cut brings you one step closer to completing your custom serving tray and showcasing your woodworking skills. Remember, the journey of creating something unique is just as rewarding as the finished product itself.
Assemble the Tray
When it comes to creating your custom serving tray, assembling the tray is a crucial step that brings all your hard work together. This is where the individual pieces of wood come together to form the base of your tray, ready to be transformed into a functional and stylish piece for your home.
Before you begin assembling, ensure that you have all the necessary tools and materials within reach. This includes wood glue, nails or screws, a hammer or screwdriver, and, of course, the wooden pieces you have cut according to your design and dimensions.
Start by laying out the wooden pieces according to your design plan. Carefully apply wood glue along the edges that will be joined together. Then, firmly press the pieces together to create a secure bond. For added stability, you can also use nails or screws to reinforce the joints.
As you assemble the tray, pay close attention to ensure that the corners are aligned correctly and the edges are flush. This will help create a seamless look and ensure that your tray is sturdy and durable for everyday use.
Once the base of the tray is assembled, allow the wood glue to dry completely before moving on to the next step. This will ensure that the joints are strong and secure, providing a solid foundation for the finishing touches.
Remember, the assembly process is where your serving tray starts to take shape and come to life. Take your time, double-check your measurements, and enjoy the satisfaction of seeing your custom creation come together piece by piece.

Sand and Finish
Creating a personalized serving tray can add a unique touch to your home decor or make a thoughtful gift. Learn how to craft a custom serving tray with this step-by-step guide.
When it comes to perfecting your custom serving tray, sanding and finishing are crucial steps that can elevate the overall look and feel of your creation. After assembling the wooden pieces and ensuring everything fits together seamlessly, it's time to focus on refining the surface and adding that final touch of polish.
Grab your sandpaper and gently smooth out any rough edges or surfaces on the tray. This step not only enhances the aesthetic appeal of the tray but also ensures that it is safe to handle, free from splinters or sharp edges that could cause harm.
Once you've achieved a smooth surface, it's time to decide on the finish for your serving tray. Whether you opt for a vibrant paint color, a rich stain to highlight the natural beauty of the wood, or a protective varnish to seal and preserve the wood, the choice is yours.
Consider the overall aesthetic you want to achieve and select a finish that complements your design. The finish not only adds a layer of protection to the wood, shielding it from moisture and wear, but also brings out the grain and texture of the wood, enhancing its visual appeal.
Applying the finish requires patience and attention to detail. Make sure to follow the manufacturer's instructions for the specific product you choose, whether it's paint, stain, or varnish. Apply thin, even coats, allowing each layer to dry completely before adding the next to achieve a professional-looking finish.
Once the finish has dried and cured, your custom serving tray will be transformed into a stunning piece that is not only functional but also a work of art. The smooth surface and lustrous finish will make your tray stand out, whether you're using it to serve drinks and snacks or displaying it as a decorative accent in your home.
By sanding and finishing your serving tray with care and attention to detail, you'll create a personalized masterpiece that reflects your style and craftsmanship. Enjoy the satisfaction of showcasing your custom creation and impressing your guests with a one-of-a-kind piece that you can be proud of.
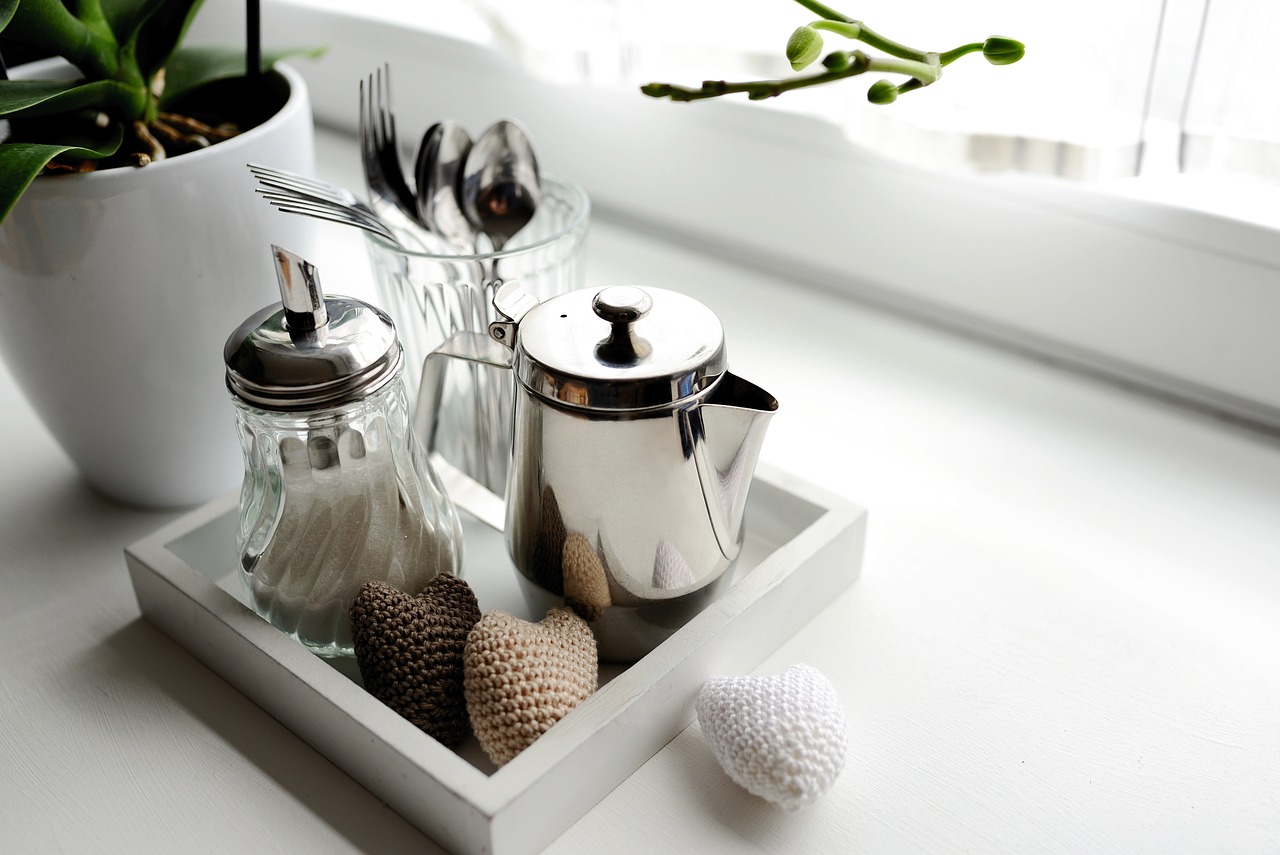
Add Handles
Adding handles to your custom serving tray is not only functional but also adds a touch of elegance to the overall design. When selecting handles, consider both style and practicality to ensure they complement the tray while making it easy to carry. Choose handles that are sturdy and comfortable to grip, enhancing the usability of your serving tray.
When attaching the handles, make sure to position them symmetrically on each side of the tray for a balanced look. Use screws or nails to secure the handles firmly to the wood, ensuring they can withstand the weight of items placed on the tray without coming loose. The handles should be attached securely to prevent any accidents or damage to the tray.
Opt for handles that match the aesthetic of your serving tray, whether you prefer a modern, rustic, or classic design. Consider the material, color, and shape of the handles to create a cohesive and visually appealing final product. The handles should seamlessly blend into the overall look of the tray, enhancing its beauty and functionality.
Additionally, you can customize the handles further by painting or staining them to match the color scheme of the tray. This personal touch adds a unique flair to your serving tray and allows you to tailor every detail to your preferences. Experiment with different finishes or decorative elements to make the handles stand out and become a focal point of the tray.
Overall, adding handles to your custom serving tray is a simple yet impactful step that elevates the design and usability of the piece. By carefully selecting and attaching handles that complement the tray's style, you can create a functional and aesthetically pleasing serving accessory that is sure to impress guests and elevate your dining experience.

Personalize with Decorative Touches
Personalizing your custom serving tray with decorative touches is where you can truly let your creativity shine. Whether you prefer a minimalist design or a more elaborate look, there are numerous ways to add a personal touch to your tray.
One option is to incorporate stenciled designs onto the surface of the tray. Stencils allow you to easily create intricate patterns or images with paint, adding a unique and artistic flair to your creation. You can choose from a variety of stencil designs to suit your style and preferences.
Another way to personalize your serving tray is by using decals. Decals come in a wide range of designs and themes, allowing you to customize your tray with anything from floral motifs to geometric patterns. Applying decals is a simple yet effective way to add visual interest to your tray.
If you're looking to achieve a glossy and professional finish, consider using a resin coating. Resin can be poured over the surface of the tray, creating a smooth and durable layer that enhances the appearance of the wood. This technique not only adds a sleek finish but also provides protection for your tray.
For a more rustic or natural look, you may opt to incorporate elements such as dried flowers, leaves, or even small pebbles into the design of your serving tray. These organic touches can add texture and a touch of nature to your creation, making it truly one-of-a-kind.

Enjoy Your Custom Creation
After putting your time, effort, and creativity into crafting your custom serving tray, it's time to sit back and admire your handiwork. Your unique creation is not just a functional piece but also a reflection of your personal style and craftsmanship. Whether you choose to display it proudly in your own home or gift it to someone special, your custom serving tray is bound to spark joy and admiration.
Frequently Asked Questions
- Can I use different types of wood for my custom serving tray?
Absolutely! You can choose from a variety of woods such as pine, oak, maple, or even reclaimed wood to create your unique serving tray.
- Do I need to have advanced woodworking skills to make a custom serving tray?
Not at all! This DIY project is suitable for beginners with basic woodworking skills. Just follow the step-by-step guide and you'll be able to craft a beautiful serving tray.
- Can I personalize the serving tray with a special message or design?
Yes, definitely! You can add a personal touch by engraving a message, painting a design, or using decoupage to customize your serving tray according to your preferences.
- Is it necessary to apply a finish to the wood?
Applying a finish such as paint, stain, or varnish is recommended not only for protection but also to enhance the appearance of the wood and make it more durable for everyday use.
- How can I care for and maintain my custom serving tray?
To keep your serving tray looking its best, simply wipe it clean with a damp cloth and avoid prolonged exposure to moisture or heat. Regularly applying a wood conditioner can also help maintain its luster.