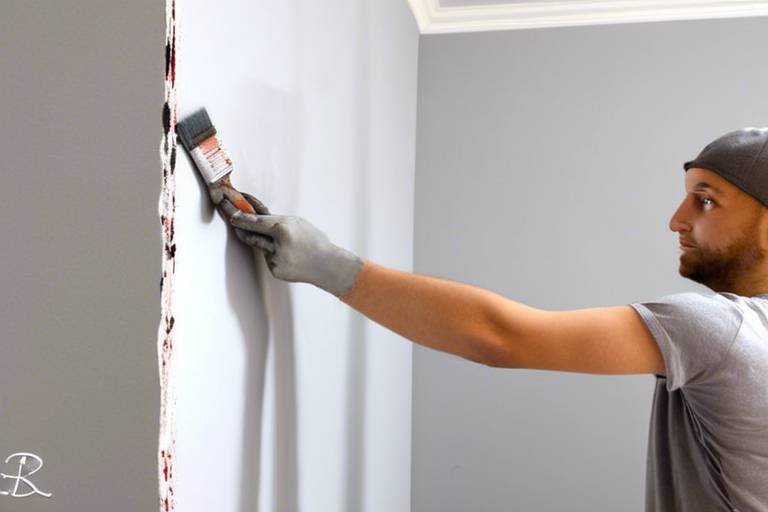
How to Achieve a Custom Paint Finish with Stencils
Creating a custom paint finish with stencils is a fantastic way to add a personal touch and artistic flair to your projects. By following the right techniques and tips, you can achieve stunning results that will impress everyone who sees your work. Let's dive into the process of using stencils to create a unique and eye-catching paint finish.
First and foremost, choosing the right stencil design is crucial in achieving a successful custom paint finish. The design you select should complement your project and align with the aesthetic you want to achieve. Whether you prefer intricate patterns or bold shapes, the stencil design sets the foundation for the entire painting process.
Once you have your stencil design ready, the next step is prepping the surface. Properly preparing the surface by cleaning, sanding, and priming ensures that the paint adheres well and the stencil design appears crisp and clean. A well-prepped surface is key to achieving professional-looking results.
Securing the stencil in place is essential to prevent any smudging or shifting during the painting process. There are various methods for securely positioning the stencil on the surface, such as using painter's tape or stencil adhesive. Ensuring the stencil stays in place guarantees precise and accurate painting.
When it comes to applying the paint, there are different techniques you can use to achieve the desired coverage and color intensity. Whether you opt for a brush, sponge, or spray method, the key is to apply the paint evenly over the stencil to create a uniform finish. Experiment with different application methods to see what works best for your project.
After painting over the stencil, carefully remove it to reveal the custom design underneath. Taking your time during this step is crucial to prevent any smudging or bleeding of the paint. The moment you lift the stencil and see the finished design emerge is truly satisfying.
Adding detail and making touch-ups can elevate the custom paint finish to the next level. Whether you want to add extra embellishments or fix any imperfections, this step allows you to fine-tune the overall look of your project. Attention to detail is key in creating a polished and professional finish.
Once you are satisfied with the paint finish, sealing it with a protective top coat is essential for durability and longevity. The top coat helps protect the paint from wear and tear, ensuring that your custom design stays vibrant and intact over time. Don't skip this crucial step in the painting process.
Lastly, cleaning and maintaining the custom paint finish is necessary to preserve its beauty and quality. Follow the guidelines for cleaning specific to the type of paint and finish you used to ensure lasting results. With proper care, your custom paint finish will continue to impress for years to come.

Choosing the Right Stencil Design
When it comes to achieving a custom paint finish with stencils, selecting the right stencil design is crucial in bringing your creative vision to life. The stencil design you choose can make or break the overall look of your project, so it's essential to choose wisely. Consider the style and theme of your project to ensure the stencil design complements and enhances the final result.
Before diving into the world of stencil designs, take some time to explore different options and find inspiration. Whether you prefer intricate patterns, geometric shapes, floral motifs, or abstract designs, there is a wide range of stencil designs available to suit various preferences and project themes. Think about the mood and atmosphere you want to create with your custom paint finish to guide your stencil design selection.
Additionally, consider the size and scale of the stencil design in relation to the surface you will be painting. A design that is too large may overwhelm a small surface, while a design that is too small may get lost on a larger area. Finding the right balance in size will ensure that the stencil design stands out and makes a statement on your project.
Furthermore, think about the versatility of the stencil design. Will it work well for your current project, and can it be reused for future projects? Opting for a stencil design that offers flexibility and can be adapted for different applications will maximize its value and allow you to unleash your creativity in various ways.
Lastly, don't be afraid to experiment and mix and match stencil designs to create a unique and personalized custom paint finish. Combining different patterns, shapes, and motifs can result in a one-of-a-kind look that reflects your individual style and artistic flair. Embrace the opportunity to play with various stencil designs and let your imagination run wild to achieve a truly exceptional paint finish.

Prepping the Surface
Before diving into the exciting world of custom paint finishes with stencils, it's crucial to start with a clean canvas, quite literally. Prepping the surface sets the foundation for a flawless and professional-looking end result. Think of it as priming a wall before painting it a vibrant color - the surface needs to be smooth and ready to absorb the paint for the stencil design to shine through.
First things first, cleaning the surface is essential. Dust, dirt, and grime can hinder the adhesion of the paint and affect the overall finish. A simple wipe down with a damp cloth or a gentle cleaning solution can work wonders. Remember, a clean surface is a happy canvas!
Next up, sanding the surface is key to creating a smooth and even base for your custom paint finish. Sandpaper with a fine grit can help remove any imperfections, bumps, or rough spots, ensuring that the paint goes on evenly. It's like smoothing out the wrinkles on a piece of fabric before sewing - the end result is much neater and polished.
Once the surface is clean and smooth, priming is the next step. Primer acts as a bonding agent between the surface and the paint, promoting better adhesion and longevity of the finish. Think of it as laying down a foundation before building a house - it provides stability and ensures a strong structure for the paint to adhere to.
By cleaning, sanding, and priming the surface diligently, you're setting yourself up for success in achieving a stunning custom paint finish with stencils. Remember, the preparation process is like laying the groundwork for a masterpiece - take your time, pay attention to detail, and enjoy the creative journey!
Securing the Stencil
When it comes to achieving a flawless custom paint finish with stencils, securing the stencil in place is a crucial step that can make or break the final result. Imagine trying to paint a delicate design only for the stencil to shift or smudge, ruining all your hard work in an instant. That's why ensuring the stencil stays securely in place is essential for precise and professional-looking outcomes.
There are several effective methods for securing the stencil on the surface before you start painting. One common approach is to use painter's tape to fix the stencil firmly in position. This tape not only holds the stencil in place but also helps create clean edges and borders for your design. Another option is to use stencil adhesive spray, which provides a strong bond between the stencil and the surface, preventing any movement during the painting process.
For more intricate or detailed stencils, consider using stencil brushes with built-in stabilizers. These brushes have bristles that extend beyond the base, allowing you to hold the stencil down securely while applying paint with precision. Additionally, using a stencil level can help ensure that the stencil is perfectly aligned and flat against the surface, reducing the risk of any smudging or distortion in the final design.
Before you start painting, take the time to test the stencil's positioning and adhesion to avoid any surprises or mishaps. Make sure the stencil is firmly secured on all sides, with no gaps or loose edges that could lead to paint bleeding underneath. By investing a little extra effort in securing the stencil correctly, you can guarantee a smooth painting process and a flawless custom paint finish that will leave a lasting impression.

Applying the Paint
When it comes to applying the paint over the stencil, there are several techniques you can use to achieve the desired results. The method you choose will depend on the type of project you are working on and the effect you want to create. Whether you prefer using a brush, sponge, or spray, each technique offers its own unique advantages.
Using a brush is a traditional and versatile way to apply paint over a stencil. It provides you with more control over the application, allowing you to create precise lines and details. With a steady hand and the right brush size, you can achieve a clean and professional finish. Make sure to dab off excess paint before applying it to the stencil to prevent bleeding.
For a softer and more blended look, consider using a sponge to apply the paint. Dabbing the sponge lightly over the stencil can create a textured effect, adding depth and dimension to your design. Experiment with different sponge sizes and textures to achieve the desired coverage and intensity of color.
If you are looking for a quick and even application, using a spray method may be the best option. Spray paint can provide a smooth and seamless finish, ideal for larger stenciled areas or when working on multiple projects. Ensure proper ventilation and cover surrounding areas to avoid overspray and achieve a clean result.
Before starting the painting process, it's essential to test your chosen method on a small area to determine the coverage and color intensity. This will help you adjust your technique and ensure the final result meets your expectations. Remember, practice makes perfect, so don't be afraid to experiment with different application methods to find what works best for your project.

Removing the Stencil
When it comes to removing the stencil after painting, precision and care are key to achieving a flawless custom design. Once the paint has dried to the touch but is still slightly tacky, gently peel off the stencil to unveil your masterpiece. Avoid rushing this step to prevent any smudging or bleeding of the paint, which could compromise the crispness of your design. Additionally, using a fine-tip brush or cotton swab dipped in a bit of paint thinner can help clean up any edges or details that may need touching up. By taking your time and being meticulous, you can ensure a clean and professional-looking finish.
Adding Detail and Touch-Ups
When it comes to achieving a truly custom paint finish with stencils, the devil is in the details. Adding those final touches and making any necessary touch-ups can take your project from good to great. Think of it as putting the cherry on top of a delicious cake - it's the little things that can make all the difference.
One way to add detail to your custom paint finish is by incorporating additional stencil designs or patterns. This can help create depth and visual interest, giving your project a more intricate and professional look. Consider using smaller stencils to add delicate accents or borders that enhance the overall design.
Another technique for enhancing your custom paint finish is by incorporating different paint finishes or textures. Mixing matte and glossy finishes, or adding metallic or textured paints, can create a dynamic and eye-catching effect. Experimenting with different paint types can also help you achieve a more unique and personalized finish.
When it comes to touch-ups, it's essential to have a steady hand and a keen eye for detail. Use fine brushes or precision tools to fix any smudges, uneven lines, or imperfections in the paint finish. Taking the time to correct these small flaws can elevate the overall appearance of your project and give it a polished look.
Remember, adding detail and making touch-ups is all about refining your custom paint finish and ensuring that every aspect is perfect. It's like fine-tuning a musical performance or adding the final brushstrokes to a masterpiece - the attention to detail is what sets your project apart and makes it truly exceptional.

Sealing the Finish
When it comes to achieving a professional and long-lasting custom paint finish with stencils, is a crucial step that should not be overlooked. Applying a protective top coat not only enhances the appearance of the paint but also ensures its durability and resistance to wear and tear over time.
There are various options available for sealing your custom paint finish, ranging from matte to glossy finishes. The choice of sealant depends on the desired final look of your project. A matte finish provides a subtle and understated appearance, while a glossy finish adds shine and depth to the paint.
Before applying the sealant, it is essential to make sure that the painted surface is completely dry. Any moisture trapped beneath the sealant can lead to bubbling or uneven drying, affecting the overall finish of the project. Additionally, ensure that the area is well-ventilated to allow for proper curing of the sealant.
When applying the sealant, use a clean and high-quality brush or roller to achieve a smooth and even finish. Work in thin, even coats, allowing each layer to dry completely before applying the next. This helps prevent streaks or bubbles in the sealant and ensures a professional-looking result.
If you prefer a more hands-on approach, you can also use a spray sealant for quick and easy application. Spray sealants provide a fine, even mist that covers the surface evenly, resulting in a seamless finish. However, be cautious of overspraying, as it can lead to drips or pooling of the sealant.
Once the sealant has been applied, allow it to cure according to the manufacturer's instructions. This typically involves letting the project dry for a specified period before subjecting it to any handling or environmental elements. Proper curing ensures that the sealant forms a strong and protective barrier over the custom paint finish.
Remember that sealing the finish is not just about enhancing the appearance of your project but also about preserving the hard work and creativity you put into it. A well-sealed custom paint finish will maintain its beauty and quality for years to come, allowing you to enjoy your creation for an extended period.
Cleaning and Maintaining
When it comes to achieving a custom paint finish with stencils, proper cleaning and maintenance play a crucial role in preserving the beauty and longevity of your project. After all the hard work you've put into creating a unique design, it's essential to take care of it to ensure it lasts for years to come.
One of the key aspects of cleaning and maintaining a custom paint finish is using the right cleaning products. Harsh chemicals can damage the paint and the protective top coat, so opt for gentle cleaners that won't strip away the finish. Additionally, avoid abrasive scrubbing tools that can scratch the surface.
Regular dusting and gentle wiping with a soft, damp cloth can help keep your custom paint finish looking fresh and vibrant. For tougher stains or dirt buildup, consider using a mild soap solution and a soft brush to gently scrub the surface without causing damage.
It's also important to avoid exposure to extreme temperatures and direct sunlight, as these can fade the paint and weaken the protective top coat over time. By keeping your project away from harsh environmental conditions, you can prolong its lifespan and maintain its original beauty.
When it comes to maintaining the custom paint finish, periodic touch-ups may be necessary to address any chips, scratches, or wear and tear that may occur over time. By promptly addressing these issues, you can prevent further damage and ensure that your project continues to look its best.
Lastly, consider applying a fresh coat of protective top coat every few years to maintain the finish's durability and resistance to daily wear and tear. This extra layer of protection can help extend the life of your custom paint finish and keep it looking as good as new.
Frequently Asked Questions
- Can I reuse stencils for multiple projects?
Yes, stencils can be reused for multiple projects depending on the quality of the stencil material and how well it is cleaned after each use. Proper cleaning and storage of stencils can help maintain their integrity and ensure crisp stencil designs for future projects.
- What is the best way to clean stencils?
The best way to clean stencils is to immediately wash them after use with warm, soapy water and a soft brush to remove any paint residue. For stubborn paint, a gentle solvent or stencil cleaner can be used. Make sure to dry the stencil thoroughly before storing it to prevent any damage or warping.
- Can stencils be used on different surfaces?
Yes, stencils can be used on a variety of surfaces such as walls, furniture, fabric, and more. It is important to choose the right type of paint and application method based on the surface material to achieve the best results. Testing the stencil on a small area first is recommended to ensure compatibility.


