How to Create a DIY Art Display for Kids
Are you looking for a creative way to display your kids' artwork that will not only showcase their talents but also encourage their artistic expression? Creating a DIY art display for kids can be a fun and interactive project that adds a personal touch to your home decor. By following simple steps and using basic materials, you can set up a dynamic gallery that celebrates your children's creativity.
First and foremost, gather all the necessary materials to kickstart your DIY art display project. You will need frames of various sizes, strings or wires, clips or clothespins, hooks, a staple gun or nails, and, of course, your children's artwork. These supplies will form the foundation of your art display and make the process of assembling it much smoother.
Once you have gathered your materials, the next step is to select the perfect display area in your home. Choose a wall or space that is easily accessible to your kids so they can proudly view and interact with their displayed masterpieces. Consider a location that is at their eye level to make it convenient for them to hang and replace their artwork whenever they please.
Now comes the fun part - preparing the frames! Get creative by customizing the frames to reflect your children's personalities. You can paint the frames in vibrant colors, add glitter, or decorate them with stickers to give them a playful and unique touch. Let your kids join in on the fun and personalize their frames to make the art display truly their own.
To create a hanging space for the artwork, attach strings horizontally across the frames using a staple gun or nails. This will allow you to easily clip or pin the artwork to the strings, ensuring a secure display that can be changed out whenever new pieces are created. Make sure the strings are taut and evenly spaced to maintain a cohesive look.
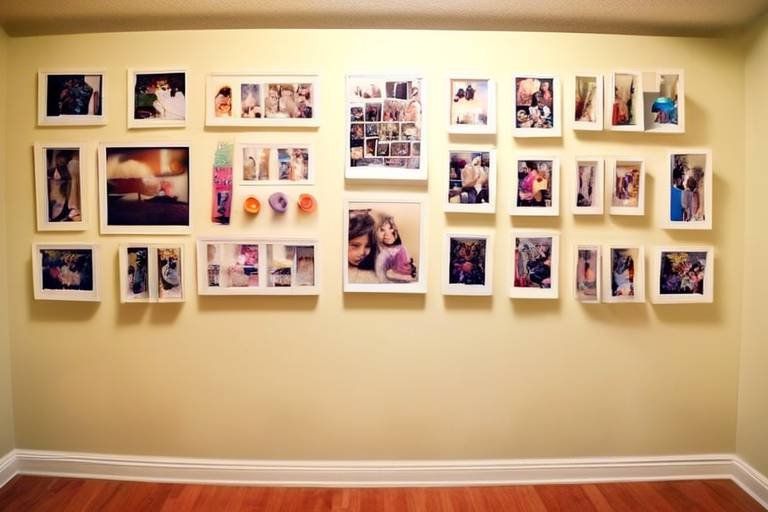
Once the frames are ready, it's time to hang them on the selected wall. Ensure that the frames are evenly spaced and at a height that is accessible to your children. This way, they can independently hang up their artwork and take pride in showcasing their creativity. Encourage them to rotate and update the display regularly to keep it fresh and engaging.
To securely hold and display the artwork, attach clips or clothespins to the strings on the frames. This will prevent the artwork from falling off while allowing for easy removal and replacement. The clips or clothespins also add a charming element to the display, enhancing the overall aesthetic of the gallery.
As you encourage art rotation and celebrate your children's creative achievements, the DIY art display becomes more than just a decorative piece in your home. It becomes a platform for boosting their confidence and self-esteem, showcasing their talents, and fostering a love for art. By creating a personalized gallery that evolves with their creativity, you are nurturing their artistic growth and creating lasting memories.

Gather Materials
When embarking on the journey of creating a DIY art display for kids, the first step is to that will bring your vision to life. Imagine yourself as a treasure hunter seeking out the key components to unlock a world of creativity and imagination for your little artists.
Picture a scenario where you are rummaging through your craft supplies, searching for frames, strings, clips, and hooks like a detective on a mission. These items will serve as the building blocks of your art display, allowing you to piece together a masterpiece that will showcase your children's creativity.
As you collect the necessary supplies, envision the excitement on your kids' faces as they witness the transformation of these simple materials into a fun and interactive art gallery tailored just for them. It's like gathering ingredients for a recipe, each item playing a crucial role in the final dish of artistic expression.
Consider creating a table to organize your materials, laying them out like a painter's palette ready to be used in creating a vibrant masterpiece. This visual aid will not only streamline the assembly process but also add a touch of organization to your creative endeavor.

Select a Display Area
When it comes to creating a DIY art display for kids, one of the crucial steps is selecting the perfect display area in your home. The display area should be easily accessible to children, allowing them to admire their artwork proudly. Consider choosing a wall in a common area like the living room or playroom, where kids spend a lot of time and can showcase their creativity to family and friends.
Additionally, it's essential to ensure that the chosen display area has enough space to accommodate the frames and artwork without looking cluttered. A well-lit area with natural light can enhance the visibility of the displayed artwork and make it more appealing to both kids and visitors.
If you have multiple children creating art, you may want to designate a specific section of the display area for each child to showcase their individual masterpieces. This not only adds a personal touch to the art display but also helps each child feel special and appreciated for their creativity.

Prepare the Frames
When it comes to setting up your DIY art display for kids, preparing the frames is a crucial step that sets the tone for the entire project. Think of the frames as the foundation of your art gallery, where your little ones' creations will come to life. To start, gather a variety of frames in different sizes and shapes to add visual interest to the display. You can repurpose old frames or purchase new ones from a craft store, depending on your preference and budget.
Once you have your frames ready, it's time to get creative! Consider customizing the frames to match your children's personalities and the overall theme of the room. You can paint the frames in bold and vibrant colors to make them pop against the wall or add decorative elements like stickers, glitter, or even small toys to give them a playful touch.
To ensure that the frames complement the artwork rather than overshadow it, opt for simple designs that enhance the pieces without distracting from them. Remember, the goal is to create a cohesive and visually appealing display that highlights your kids' creativity.

Attach Strings
When it comes to creating a DIY art display for kids, attaching strings is a crucial step in providing a space for hanging their artwork. To securely display the masterpieces, you can use a staple gun or nails to attach strings horizontally across the frames. This method not only offers a practical solution for hanging the artwork but also adds a decorative element to the display.
By incorporating strings into the art display, you create a dynamic and interactive gallery where children can easily showcase their creativity. The strings act as versatile hanging spaces, allowing for easy arrangement and rearrangement of the artwork. This flexibility encourages kids to take ownership of their display, fostering a sense of pride in their creations.
Moreover, attaching strings provides a visually appealing way to present the artwork. The vibrant colors of the strings against the backdrop of the frames enhance the overall aesthetic of the display, making it an attractive focal point in any room. This visual interest not only showcases the artwork effectively but also adds a playful and artistic touch to the space.
Additionally, the process of attaching strings can be a fun and engaging activity for kids to participate in. Involving them in setting up the art display fosters a sense of involvement and creativity from the start. As they help attach the strings, children can feel a sense of accomplishment and contribution to the final result, further enhancing their connection to the displayed artwork.

Hang the Frames
When it comes to hanging the frames for your DIY art display, precision and creativity play key roles in making the final product visually appealing and functional. Before you start mounting the frames on the wall, ensure that you have selected the ideal location that is easily accessible to children. Remember, the goal is to create a space where kids can proudly showcase their artwork and interact with it freely.
Once you have determined the perfect spot for the art display, it's time to hang the frames. Make sure to use a level to ensure that the frames are straight and evenly spaced. You want the overall arrangement to look cohesive and well-balanced. Consider the height at which you place the frames; it should be low enough for children to reach comfortably and hang their artwork without assistance.
If you are using multiple frames, creating a uniform look is essential. You can align them in a straight line or get creative by arranging them in a unique pattern. Think of it as designing a mini art gallery for your little ones, where each frame tells a story and contributes to the overall aesthetic of the display.
When hanging the frames, pay attention to the weight of the artwork that will be displayed. Ensure that the hooks or nails you use are sturdy enough to support the frames and any additional items such as clips or clothespins. By taking the time to secure the frames properly, you can prevent accidents and ensure that the art display remains intact and safe for children to interact with.
Remember, the process of hanging the frames is not just about functionality; it's also an opportunity to add a decorative element to the display. You can get creative with the arrangement, mixing and matching frame sizes and colors to create a visually dynamic wall of art. Encourage your kids to participate in this step, allowing them to have a say in how their masterpieces are presented.

Add Clips or Clothespins
When it comes to adding clips or clothespins to your DIY art display for kids, you are not just enhancing the functionality but also adding a touch of creativity. These small yet essential elements play a significant role in securely holding the artwork in place while also allowing for easy rotation and customization.
Clips or clothespins can be attached to the strings on the frames in a variety of ways. You can opt for colorful clips to add a pop of color to the display or choose classic wooden clothespins for a more rustic look. Whichever option you go for, ensure that they are sturdy enough to hold the artwork without causing any damage.
Consider creating a visual pattern with the clips or clothespins on the strings to add an artistic flair to the display. You can arrange them in a uniform manner or mix and match different styles for a more eclectic look. Encouraging kids to participate in this process can make it even more engaging and personalized.
Furthermore, using clips or clothespins allows for easy art rotation. Children can easily swap out their older pieces for new creations without the need for any additional tools or materials. This not only keeps the display fresh and dynamic but also encourages kids to continue creating and showcasing their artwork.

Encourage Art Rotation
Encouraging art rotation is essential to keep the DIY art display fresh and engaging for kids. By regularly swapping out old artwork with new creations, you create a dynamic gallery that sparks creativity and excitement. Imagine the joy on a child's face when they see their latest masterpiece proudly displayed for all to admire. It not only showcases their artistic growth but also instills a sense of pride and accomplishment.
One way to facilitate art rotation is to establish a schedule or routine for updating the display. Whether it's weekly, bi-weekly, or monthly, having a set time to refresh the artwork encourages children to continue creating and sharing their work. This process of renewal fosters a sense of anticipation and keeps the display area alive with new stories and ideas.
Additionally, involving children in the selection process can make art rotation even more exciting. Ask them to choose which pieces they want to showcase next or let them curate their mini-exhibitions within the display. This not only empowers them to make decisions but also nurtures their creativity and critical thinking skills.
Furthermore, using themed rotations can add an extra layer of fun to the display. For example, you could dedicate a month to nature-inspired art or have a "color of the week" theme. This approach not only organizes the rotation but also encourages children to explore different subjects and techniques in their artwork.
Remember, the goal of art rotation is not just to change what's on display but to celebrate the process of creation. Each piece tells a story, captures a moment in time, and reflects the unique perspective of its young artist. By embracing art rotation, you create a dynamic and ever-evolving gallery that celebrates the creativity and imagination of children.

Celebrate Achievements
This article provides step-by-step instructions on creating a fun and interactive DIY art display for kids, fostering creativity and showcasing their masterpieces in a personalized way.
When it comes to fostering a child's creativity, celebrating their achievements plays a crucial role. The art display you've created is not just a place to hang their artwork; it's a stage for their accomplishments. Imagine it as a mini art gallery in your home, where each piece displayed represents a milestone in your child's artistic journey. By showcasing their work prominently, you are acknowledging their efforts and talents, instilling a sense of pride within them.
Moreover, celebrating their achievements can boost their confidence and self-esteem. When children see their artwork being appreciated and displayed, it validates their efforts and encourages them to continue exploring their creative side. It sends a powerful message that their creations are valued and worthy of being showcased, fostering a positive self-image and a sense of accomplishment.
Consider creating a special section within the art display to highlight exceptional pieces or milestones in their artistic development. This could be a spotlight frame or a designated area where you rotate and feature their best works. By doing so, you not only celebrate their achievements but also create a sense of progression and growth, encouraging them to set new goals and reach higher artistic heights.
Have a question about creating a DIY art display for kids? Check out our FAQs below:
- Q: How often should I rotate the artwork on the display?
- Q: Can I use other materials besides frames for the display?
- Q: How can I involve my child in the display creation process?
A: It's recommended to rotate the artwork every 2-4 weeks to keep the display fresh and engaging for your child.
A: Yes, you can get creative with materials like corkboards, wire grids, or even repurposed wooden pallets to create unique art display surfaces.
A: Encourage your child to help customize the frames, choose the artwork to display, and even assist in hanging the pieces on the display. Involving them in the process enhances their sense of ownership and creativity.
Frequently Asked Questions
- Can I use any type of frames for the DIY art display?
Yes, you can use a variety of frames such as wooden, plastic, or metal frames to create the art display. Choose frames that suit your style and the overall aesthetic you want to achieve.
- How can I ensure the art display is safe for children?
Make sure to securely attach the frames to the wall using appropriate hooks or screws to prevent accidents. Avoid sharp edges or corners on the frames that could potentially harm children.
- What if my child wants to display 3D art pieces?
You can add shelves or shadow boxes to the display to showcase 3D art pieces. Simply adjust the layout of the frames to accommodate different types of artwork.
- Is it easy to change the displayed artwork frequently?
Yes, the art display is designed to make it easy to swap out artwork regularly. Simply unclip the old pieces and replace them with new creations to keep the display fresh and exciting.
- How can I involve my child in the creation of the art display?
Encourage your child to help choose the colors for the frames, select which artwork to display, and even assist in hanging the frames on the wall. This way, they can feel a sense of ownership and pride in the display.


