How to Make Your Own Handcrafted Bath Bombs
Are you ready to elevate your bath time experience with luxurious handcrafted bath bombs made right in your own home? Creating these fizzy delights is not only a fun and rewarding activity but also allows you to customize the scents and ingredients to suit your preferences perfectly.
Let's dive into the step-by-step process of crafting your very own bath bombs that will transform your ordinary bath into a spa-like retreat. With just a few simple ingredients and a dash of creativity, you can create a relaxing and aromatic experience that will leave you feeling rejuvenated and refreshed.
First and foremost, gather all the necessary ingredients and supplies to kickstart your bath bomb making journey. From baking soda and citric acid to essential oils and molds, ensure you have everything at hand before you begin. Don't forget mixing bowls, spoons, and spray bottles for water - these will be your trusty companions throughout the process.
Once you have all your ingredients ready, it's time to measure and mix the dry components - baking soda, citric acid, and Epsom salt. Combining these in a bowl, make sure to eliminate any clumps and achieve a well-blended mixture that sets the stage for that satisfying fizzy reaction once the bath bomb hits the water.
Next, add the wet ingredients and essential oils to the mix. Slowly incorporate water or witch hazel into the dry mixture while stirring continuously to prevent premature fizzing. This is where you can get creative with your favorite essential oils, infusing your bath bombs with delightful fragrances that will transport you to a state of relaxation.
As you blend the ingredients, aim for a consistency similar to a sandcastle by spritzing the mixture with water or witch hazel. The ideal texture should hold together when squeezed without being overly wet, allowing you to mold it into perfect spheres that will fizz and dissolve gracefully in your bath.
With your mixture ready, it's time to fill the molds and shape your bath bombs. Pack the mixture firmly into the molds, then press both sides together to form a cohesive sphere. Let them set for a few hours or overnight until they harden completely, ensuring a smooth and sturdy finish.
Once your bath bombs have hardened, carefully unmold them and place them on a tray to dry for 24-48 hours. It's essential to dry them in a cool, dry place away from moisture to maintain their quality and effectiveness. This crucial step ensures that your bath bombs retain their shape and fizziness when used.
Before indulging in a relaxing bath, test one of your handcrafted bath bombs in water to experience the delightful fizziness and fragrance it offers. Store the remaining bath bombs in an airtight container or wrap them individually to preserve their freshness and potency for future use.
Finally, it's time to treat yourself to a luxurious bath experience by dropping your homemade bath bomb into warm water. Watch as it fizzes and releases enchanting scents and skin-nourishing ingredients, creating a sensory delight that will leave you feeling pampered and renewed.
Gather Ingredients and Supplies
When it comes to creating your own handcrafted bath bombs, the first step is to gather all the necessary ingredients and supplies to ensure a successful and enjoyable crafting experience. Before diving into the exciting process of making luxurious bath bombs, it's essential to have everything you need at hand.
Start by preparing the core ingredients that form the foundation of your bath bombs. You will need baking soda, citric acid, and Epsom salt to create the fizzy reaction that makes bath bombs so enjoyable. These ingredients are readily available at most stores and are crucial for achieving the desired effect.
In addition to the dry ingredients, essential oils play a key role in adding fragrance and therapeutic benefits to your bath bombs. Choose your favorite scents, such as lavender, eucalyptus, or citrus, to personalize your bath bombs and enhance your bathing experience.
Alongside the ingredients, gather the necessary tools and supplies to facilitate the crafting process. You will need mixing bowls to combine the ingredients, spoons for measuring and mixing, molds to shape the bath bombs, and spray bottles for water, which helps bind the ingredients together.
Having all your ingredients and supplies organized and within reach will streamline the bath bomb-making process and ensure a smooth and enjoyable crafting session. Once you have everything ready, you can proceed to the next steps of measuring, mixing, and molding your handcrafted bath bombs.
Measure and Mix Dry Ingredients
When it comes to creating luxurious handcrafted bath bombs at home, one of the crucial steps is to measure and mix the dry ingredients correctly. This process sets the foundation for a fizzy and aromatic bath bomb that will elevate your bathing experience to a whole new level.
First and foremost, gather all the necessary dry ingredients for your bath bombs. This includes baking soda, citric acid, and Epsom salt. These ingredients work together to create the fizzing sensation that bath bombs are known for. Make sure to measure out the exact amounts specified in your recipe to achieve the perfect balance of ingredients.
Once you have all your dry ingredients ready, it's time to mix them together. Use a mixing bowl to combine the baking soda, citric acid, and Epsom salt thoroughly. Ensure there are no clumps in the mixture, as any uneven distribution can affect the fizzing reaction when the bath bomb is used.
Think of this step as creating a harmonious blend of ingredients, each playing a crucial role in the overall performance of your bath bomb. The key is to achieve a uniform mixture that will react seamlessly when it comes into contact with water.
Imagine yourself as a chemist in a lab, carefully measuring and mixing the components to create a magical concoction that will transform your bath time into a spa-like experience. The precision and care you put into this step will reflect in the quality of the final product, ensuring a delightful bath bomb every time.
Remember, the magic of bath bombs lies in the careful balance of ingredients and the meticulous mixing process. Take your time with this step, ensuring that each ingredient is incorporated evenly to guarantee a consistent fizz and fragrance when you finally use your handcrafted bath bomb.
Add Wet Ingredients and Essential Oils
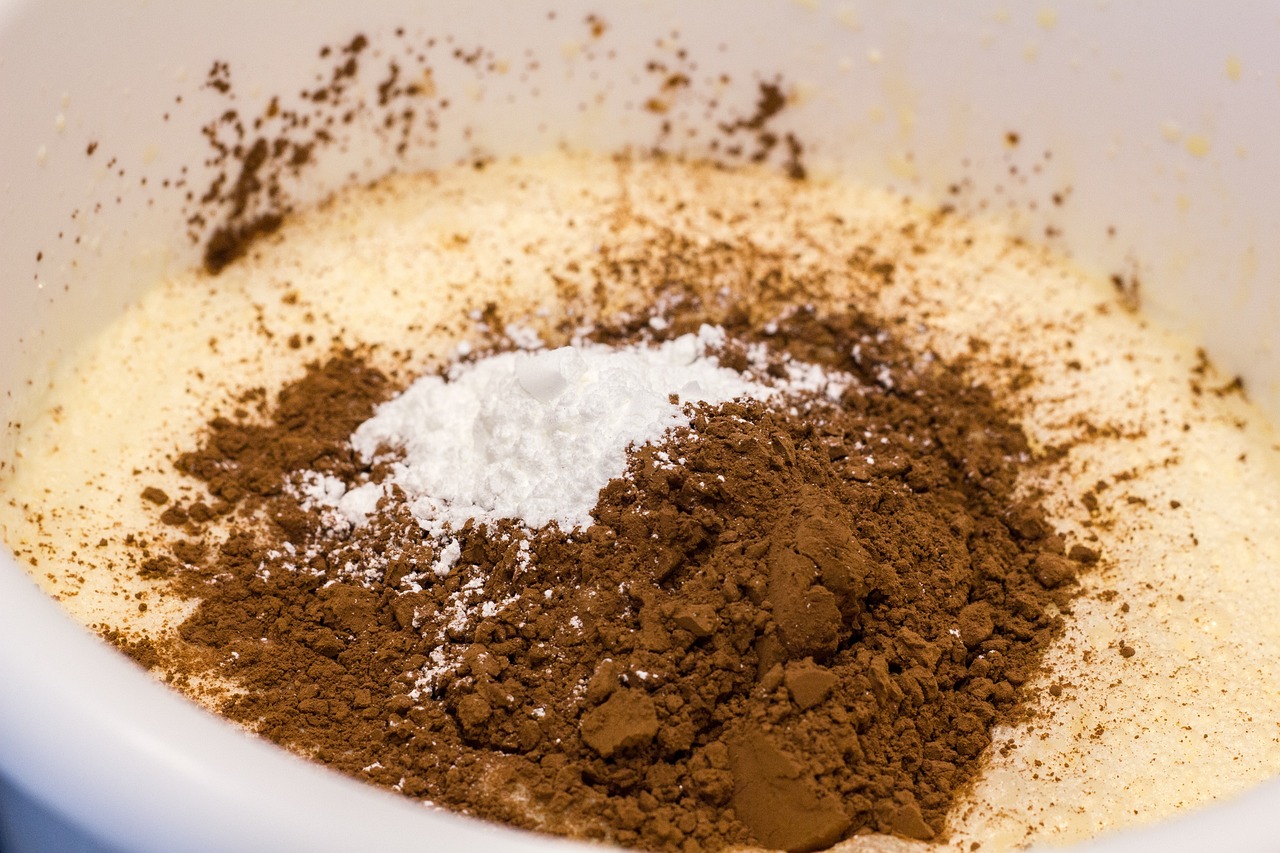
When it comes to creating your own handcrafted bath bombs, adding the wet ingredients and essential oils is a crucial step that requires precision and care. These ingredients not only help bind the dry mixture together but also provide the soothing scents and nourishing properties that make bath bombs a luxurious treat for your skin and senses.
As you slowly incorporate the wet ingredients, whether it be water or witch hazel, into the dry mixture, it's essential to stir continuously. This helps prevent the mixture from fizzing prematurely and ensures that the ingredients are evenly distributed throughout the bath bomb. Think of it as creating a harmonious blend where each element plays its part in the final product.
Adding your favorite essential oils is where the magic truly happens. These concentrated plant extracts not only infuse your bath bomb with delightful fragrances but also offer various therapeutic benefits. Whether you prefer the calming aroma of lavender, the invigorating scent of eucalyptus, or the uplifting notes of citrus oils, the choice is yours to customize your bath bomb experience.
Imagine this step as painting a canvas with scents, carefully selecting and blending essential oils to create a symphony of aromas that will transport you to a state of relaxation and bliss. Each drop added to the mixture is like adding a new layer of depth and complexity to your bath bomb creation.
Once the wet ingredients and essential oils are fully incorporated into the dry mixture, you will begin to see the transformation take place. The once separate elements now come together to form a cohesive mixture that is ready to be molded into your desired bath bomb shape. This is where the artistry of bath bomb making truly shines, as you bring together science and creativity to craft a product that is both visually appealing and sensorially delightful.
So, take your time during this step, savoring the process of adding the wet ingredients and essential oils. Let your creativity guide you as you blend scents and textures, knowing that the end result will be a handcrafted bath bomb that promises a luxurious and indulgent bathing experience.
Create Bath Bomb Mixture Consistency
Creating the perfect consistency for your bath bomb mixture is crucial to ensure a successful and enjoyable bathing experience. Imagine trying to build a sandcastle - you need just the right amount of moisture for the sand to hold together without collapsing. Similarly, when making bath bombs, you want the mixture to stick together when squeezed, but not be overly wet.
To achieve this ideal consistency, you can use a spray bottle filled with water or witch hazel. Lightly spritz the dry mixture while stirring continuously. Think of it as finding the balance between too dry and too wet, like baking a cake where the batter needs to be just right for a perfect outcome.
As you add moisture, keep testing the mixture by squeezing a small amount in your hand. Does it hold its shape without crumbling? If it's too dry, a little more spritzing is needed. If it's too wet, sprinkle in a bit more of the dry ingredients until you reach that sandcastle consistency.
Remember, the key to creating bath bomb mixture consistency is patience and practice. It may take a few tries to get it just right, but once you master the art of balancing moisture and dry ingredients, you'll be on your way to crafting luxurious bath bombs that fizz and dissolve beautifully in your bath, releasing a symphony of scents and skin-nourishing ingredients.

Fill and Mold the Bath Bombs
When it comes to creating your own handcrafted bath bombs, the process of filling and molding plays a crucial role in achieving the perfect spherical shape and ensuring a satisfying fizz in your bath. This step involves packing the bath bomb mixture into molds to create the desired shape and size, allowing it to set and harden before use.
Before filling the molds, it is essential to have the bath bomb mixture prepared to the right consistency. The mixture should be slightly damp but able to hold its shape when squeezed, similar to the texture of wet sand used in building sandcastles. This consistency ensures that the bath bomb will hold together during the molding process.
Once the bath bomb mixture is ready, carefully pack it into the molds, pressing firmly to ensure a compact and solid shape. The molds can vary in size and shape, allowing you to customize your bath bombs according to your preferences. Pressing both sides of the mold together firmly will help create a seamless sphere, ready to transform your bath experience.
After filling the molds, it is important to let the bath bombs set for a few hours or preferably overnight to allow them to harden completely. This resting period is crucial for the bath bombs to maintain their shape and solidity, ensuring a satisfying fizz and release of fragrances when used in the bath.
Once the bath bombs have hardened, carefully remove them from the molds to reveal the beautifully shaped spheres ready for use. Handle them gently to prevent any breakage or crumbling, as the hardened bath bombs can be delicate until they come into contact with water.
By following the steps to fill and mold your handcrafted bath bombs with precision and care, you can create luxurious and aromatic bath products that enhance your bathing ritual and provide a relaxing and rejuvenating experience.

Unmold and Dry the Bath Bombs
After patiently waiting for your handcrafted bath bombs to set and harden, it's time to unmold and dry them before indulging in a luxurious bath experience. Carefully remove the bath bombs from the molds, ensuring not to break them in the process. Place them gently on a tray, allowing them to dry for 24-48 hours in a well-ventilated area away from moisture.
Proper drying is crucial to ensure that your bath bombs maintain their shape and effectiveness. Placing them in a dry and cool environment will prevent them from becoming soft or losing their fizziness. This step is essential for the longevity and quality of your handcrafted creations.
Test and Store Your Handcrafted Bath Bombs
After creating your handcrafted bath bombs, it's essential to test them before storing to ensure they meet your expectations. To test the bath bombs, simply drop one into a tub of warm water and observe its reaction. Does it fizz vigorously, releasing a pleasant aroma? If so, congratulations, your bath bomb is ready to provide a luxurious bathing experience!
Once you have tested your bath bomb and confirmed its quality, it's time to store the rest for future use. Proper storage is crucial to maintain their freshness and effectiveness. The best way to store handcrafted bath bombs is in an airtight container to prevent exposure to moisture, which can cause them to lose their fizziness and fragrance over time.
If you prefer, you can also wrap each bath bomb individually in plastic wrap or tissue paper before placing them in the container. This method not only helps preserve their scent but also adds a decorative touch if you plan to give them as gifts to friends and family.
Remember to store your handcrafted bath bombs in a cool, dry place away from direct sunlight. Excessive heat or humidity can soften the bath bombs and reduce their shelf life. By following these storage tips, you can enjoy the benefits of your homemade bath bombs for weeks to come.

Enjoy Your Homemade Bath Bombs
Indulge in a soothing bath experience by dropping your handcrafted bath bomb into warm water and watch it fizz, releasing delightful scents and skin-nourishing ingredients for relaxation and rejuvenation. As the bath bomb dissolves, it will create a mesmerizing display of colors and effervescent bubbles, transforming your ordinary bath into a luxurious spa-like retreat.
As you soak in the tub, the essential oils infused in the bath bomb will envelop you in a cloud of aromatherapy, calming your senses and uplifting your mood. The moisturizing properties of the ingredients will leave your skin feeling soft and hydrated, making it a pampering treat for both your body and mind.
Take this time to unwind, let go of the day's stress, and simply enjoy the moment of self-care. Whether you choose a citrus burst, floral bouquet, or soothing lavender scent, each bath bomb offers a unique sensory experience that enhances your bathing ritual.
Feel the tension melt away as you soak in the warm water, surrounded by the fragrant steam and gentle fizzing of the bath bomb. Close your eyes, take a deep breath, and relish in the tranquility that envelops you, turning your bath time into a blissful escape from the hustle and bustle of daily life.
After your bath, revel in the silky smoothness of your skin, thanks to the nourishing ingredients in the bath bomb. Wrap yourself in a fluffy towel, feeling refreshed and rejuvenated, ready to face the world anew. Your homemade bath bombs have not only provided a luxurious bathing experience but also a moment of self-indulgence and relaxation that is truly priceless.
Frequently Asked Questions
- Can I customize the fragrance of my bath bombs?
Yes, you can personalize the scent of your handcrafted bath bombs by using different essential oils. Experiment with various combinations to create unique and delightful fragrances that suit your preferences.
- How long do homemade bath bombs last?
When stored properly in an airtight container away from moisture, handcrafted bath bombs can last for several months. It is recommended to use them within 6 months to ensure optimal fizziness and fragrance.
- Can I add color to my bath bombs?
Absolutely! You can add color to your bath bombs using skin-safe colorants or natural ingredients like beetroot powder or spirulina. Be cautious with the amount of colorant used to avoid staining the bathtub or skin.
- Are bath bombs suitable for all skin types?
While bath bombs are generally safe for most skin types, individuals with sensitive skin should be cautious, especially when using fragrances or colorants. It's advisable to perform a patch test before indulging in a full bath to ensure compatibility.
- Can I adjust the size of my bath bombs?
Yes, you can customize the size of your bath bombs by using different molds or adjusting the amount of mixture packed into each mold. Larger bath bombs may require more drying time to harden completely.


